
Multi-Factor Authentication (MFA) adds an additional layer of security to the patient login experience by requiring users to complete an additional identity verification step when accessing their portal accounts. MFA helps safeguard sensitive patient information, reduces the risk of unauthorized access, and supports stronger security practices across the patient portal.
Rollout, Supported MFA Methods, and Recovery
Initial Rollout
- MFA is optional for all patient portal users. Patients can setup MFA, or select NOT NOW to continue into their patient portal without completing the setup.
- Patients will be presented with an alert message indicating Patient Portal Multi-Factor Authentication will be required as of February 1, 2027 for all patients.
Supported MFA Methods
- Passkey (recommended): Face ID, Fingerprint, or Device Pin
- Authenticator App: Microsoft Authenticator, Google Authenticator, FreeOTP, ect
- Email Verification Code: A six digit code sent to the email address associated with the Patient’s portal account
Patients can setup more than one MFA. Having more than one method activated will allow the patient to access their patient portal if their usual method is unavailable.
Account Recovery
Recovery Codes provide a form of emergency backup access method when other activated MFA methods are unavailable. Recovery codes are one-use codes and not recommended for every day access. Recovery codes must be setup by the patient.
How to set up MFA from Patient Portal login
- Open the Patient Portal: https://mysevocityhealthlink.com
- Enter the username and password, then select Sign In
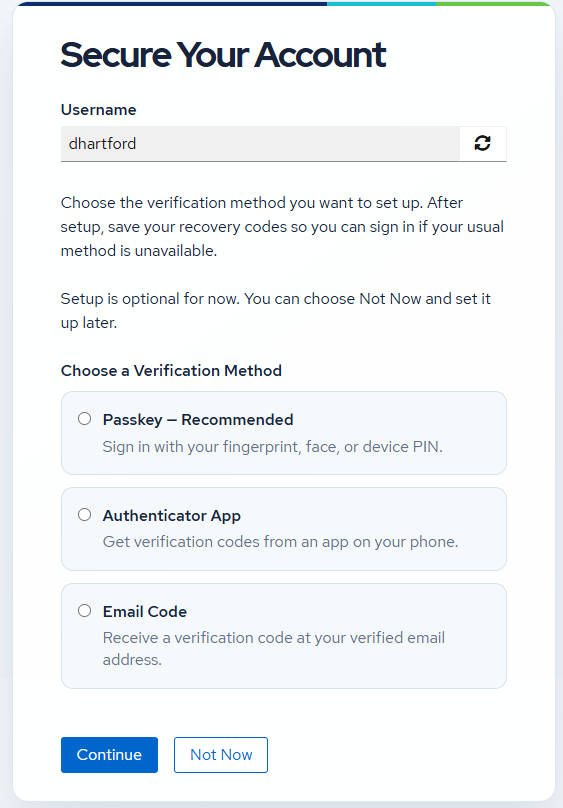
- On the Secure Your Account screen, choose a verification method
- Select continue
- Complete the selected MFA workflow – see options listed below
- Follow the recovery-code prompts to save backup codes and finish setup
- To defer setup to a later date, select NOT NOW. MFA setup will be required beginning on February 1, 2027 at which time deferring will no longer be available.
How to set up MFA from within Patient Portal Settings
- Open My Settings
- Select Security Settings
- Select Go to Security Setting
- Select Continue in the Continue to Security Settings prompt
- Sign into Patient Portal if prompted
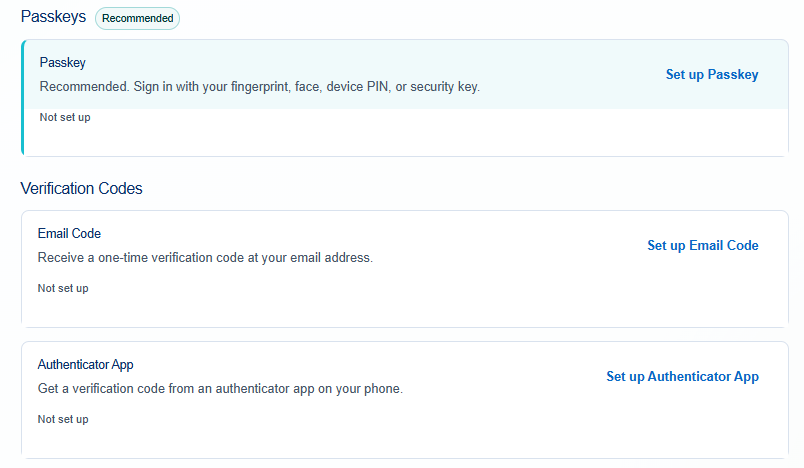
- Select the Signing In tab
- Complete the selected MFA workflow – see options listed below
MFA Methods and Setup Steps
Set up a Passkey
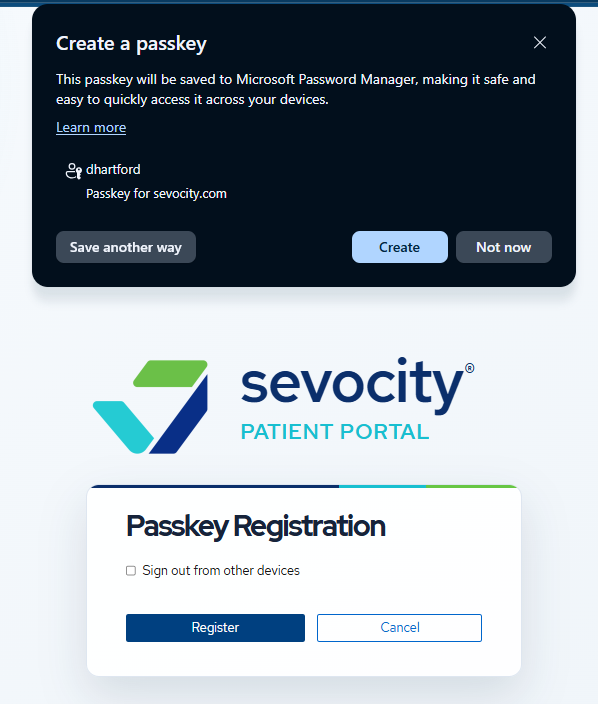
- Choose Passkey during login setup, or select Setup Passkey from the Signing In tab
- On the Passkey Registration tab, select Register
- Follow the device’s instructions to create the passkey. Device options vary: passkey may involve facial recognition, fingerprint, device pin, or security key.
- Complete all device prompts
Set up Authenticator App
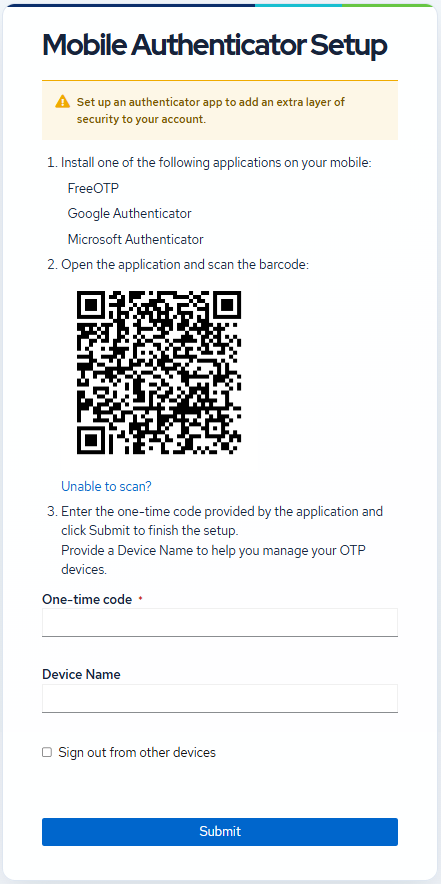
- Choose Authenticator App during login setup, or select Set up Authenticator App from the Signing In tab
- On the Mobile Authenticator Setup Screen review the currently supported authenticator options
- Install, or open, one of the listed supported apps
- Use the app to scan the QR code displayed on the setup screen
- If scanning is unavailable, select Unable to Scan? and enter the displayed setup key into the app
- Locate the current 6 digit code generated by the app for the patient portal account
- Enter that code into the One-Time Code field on the patient portal setup screen
- Enter a recognizable Device Name to identify your authenticator
- Select Submit
Set up Email Verification
Note: During this setup process, if the verification email does not arrive, the user should check their spam or junk folders and select Resend Code if needed. The verification code emailed has a five (5) minute expiration.
- Choose email code during login setup, or select Set up Email Code from the Signing In tab
- On the Setup Email Authenticator window, select Enable Email Authenticator
- Access the email inbox for the email account associated with the patient portal
- Locate the Sevocity Healthlink verification email and make note of 6 digit pin provided
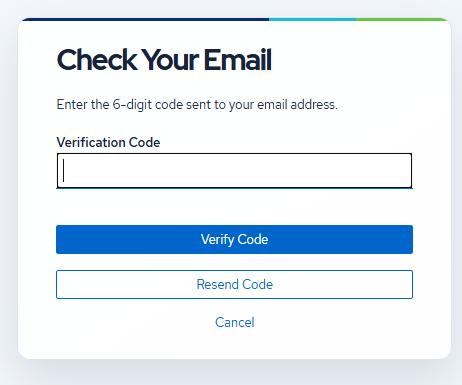
- Return to the Check your Email window and enter the 6 digit code into the Verification code field
- Select Verify Code
Set up and Save Recovery Codes
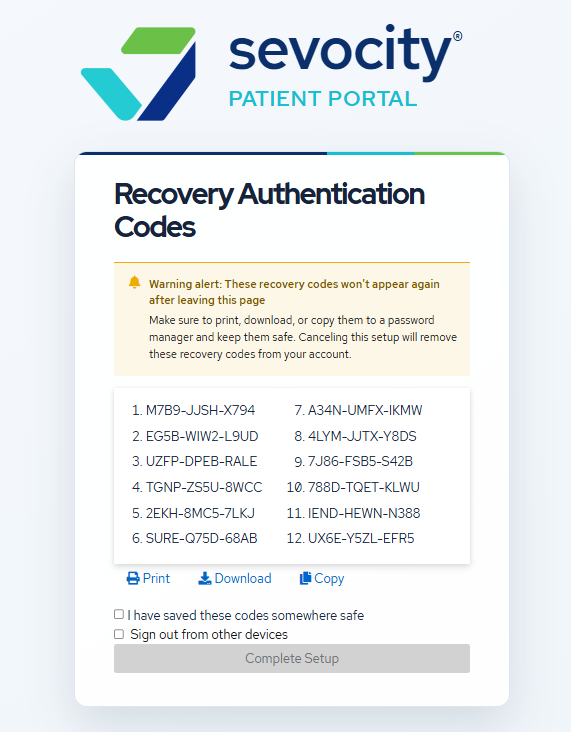
Recovery Codes provide emergency and backup access when a patient’s usual MFA method is unavailable. Ten (10) single-use recovery codes are provided.
- Choose Recovery Authentication Codes during login setup, or select Setup Recovery Codes from the Signing In tab
- Note: A warning is presented to the user that Recovery Codes will not appear again after leaving the page
- Print, Download, or Copy the codes. Copy is utilized for saving the codes in a password manager app
- Confirm the codes can be accessed once printed, downloaded or copied
- Select I have saved these codes somewhere safe
- Select Complete Setup
Portal User Guide for Patients
To download a patient-specific user guide click here.