
The Assessment tab is used to document visit assessments and manage patient problems. A patient’s active problems carry forward to each subsequent visit.
Encounter Types
Assessment is available in the following encounter types: Exam, Multi-System, Historical, Immunization, Procedure, Reconciliation, Telephone, and Urgent Care.
Configuration
- The Add (Favorites) list is customizable at the user and CLINIC level. Go to Tools > Preferences > CLINIC or [user] > Form Data > Begin Edit and select Assessment from the Tab list
- The option to require the resolved date when resolving an assessment can be enabled by the Clinic Administrator in Clinic Settings: General
- Text formatting for the Problem List on the encounter Note Display can be set by the Clinic Administrator by going to Tools > Preferences > CLINIC > Clinic Settings: Display
Problem List
The problem list displays all the patient’s active problems and any new assessments added during the visit.
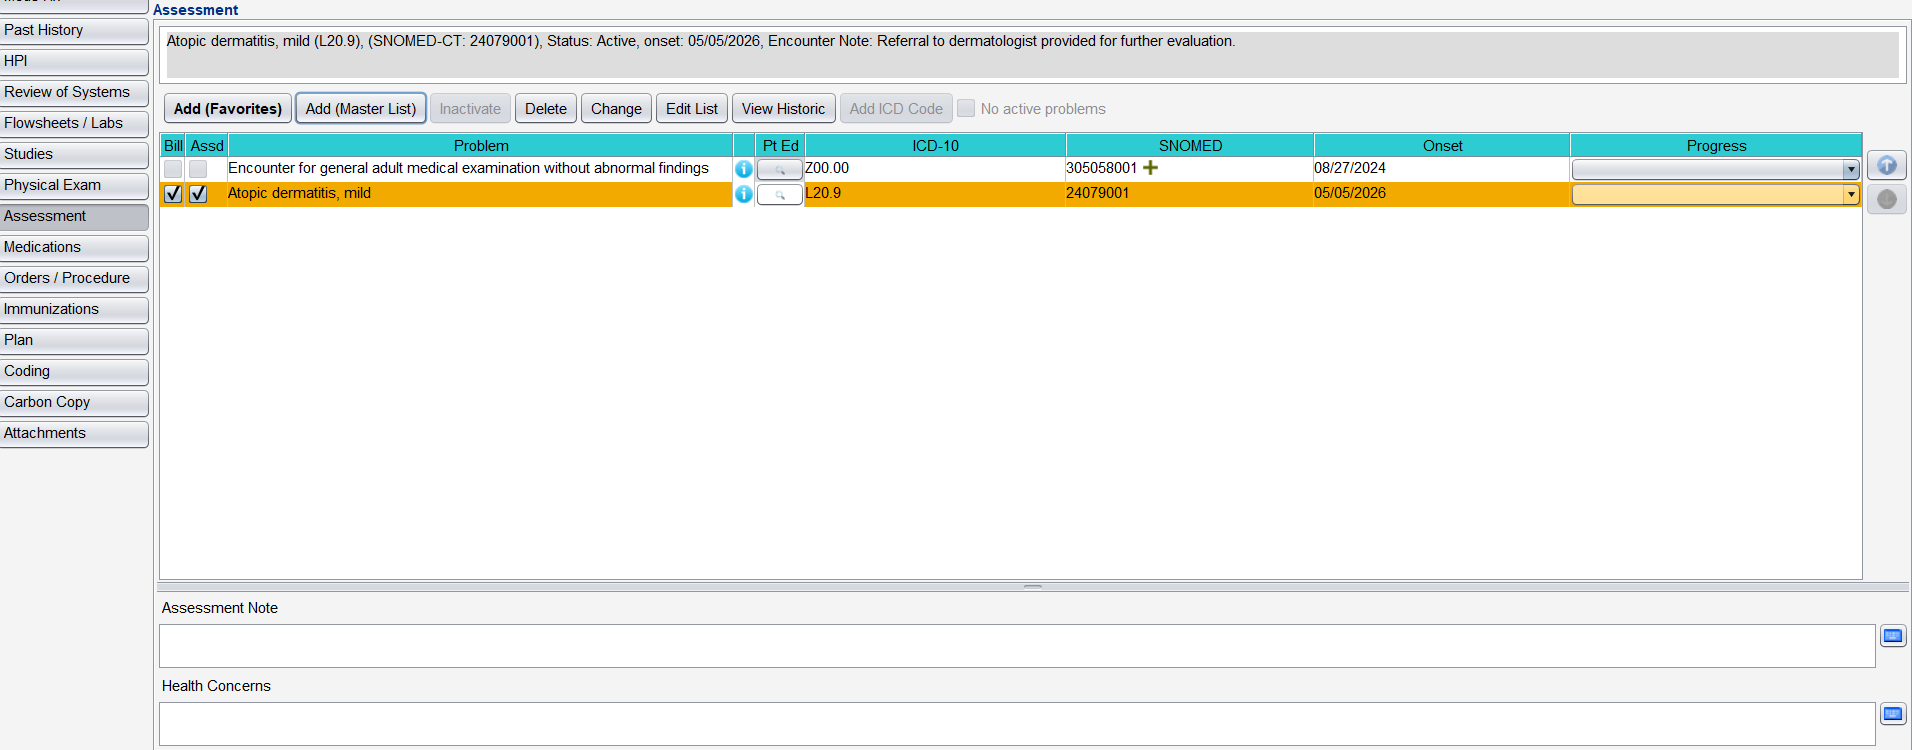
The list displays billed (Bill) and assessed (Assd) status columns, Problem name, ICD‑10 code, SNOMED CT code, Onset, and Progress for the patient’s active assessments.
- To view the assessment details, select the problem. The details display in the area above the problem list
- To access patient education for a problem, click
 (Infobutton) next to the Problem column or click
  in the Pt Ed column to launch MedlinePlus Connect website resources
Assess an Active Problem
- Go to Encounter > Assessment
- Select the problem
- Select the checkbox in the Assd column
- Selecting Assd will automatically select Bill
- Optional: clear the Bill checkbox if the assessment will not be billed for the encounter
- Optional: click Change to update the Progress, Note, and Encounter Note for the problem
- Progress can also be updated directly from the problem list
- Encounter Note will not show on subsequent encounters. The Note field will show on subsequent encounters.
Adding Assessments
Add an Assessment
- Go to Encounter > Assessment
- Click Add (Favorites) or Add (Master List)
- Select an ICD‑10 code
- If using the Favorites list, select a favorites Category, then select the ICD‑10 code
- If using the Master List, search for and locate the ICD‑10 code and click Add
- Populate the Onset Date or leave defaulted to the encounter date
- If the onset date is unknown, select Existing Assessment
- Optional: select a Progress status
- Optional: populate the Note field to document any additional information
- Optional: populate the Encounter Note field to document additional information for the current encounter
- Click Add or click Add Another and repeat the steps to add more assessments
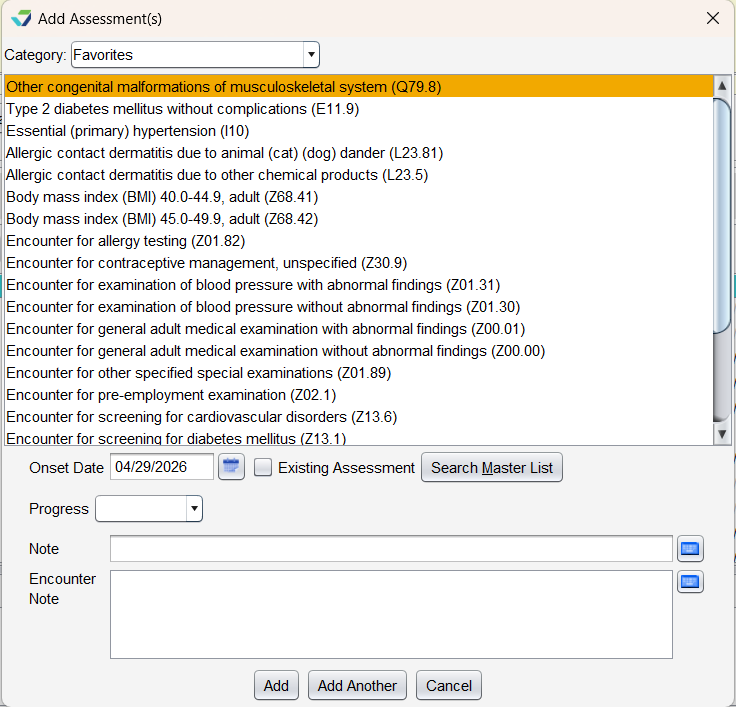
Assessments added to the encounter are automatically marked as Billed and Assessed.
Search the Master List
To add an assessment by searching the Master List:
Go to Encounter > Assessment
Click Add (Master List)
Begin typing the diagnosis description or ICD-10 code
Filter by patient age and Filter by patient sex are automatically applied to the search results. The checkboxes can be cleared for a greater range of results
Select a term from the suggested list or click Search to view more terms
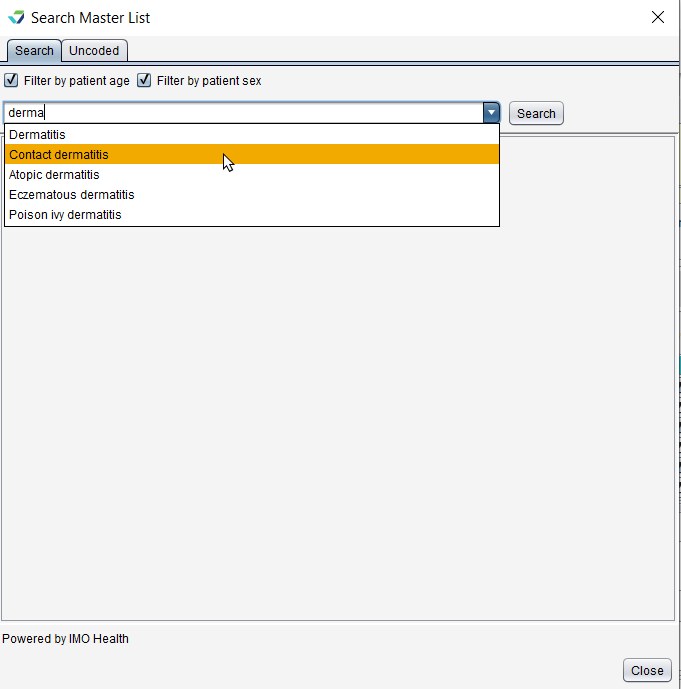
Select a diagnosis description
Descriptions with an asterisk (*) indicate additional specificity is required to determine the ICD-10. Make the appropriate selections until the final code is presented
Optional: click the star icon (
 ) to save the diagnosis to the Favorites list
Click Add
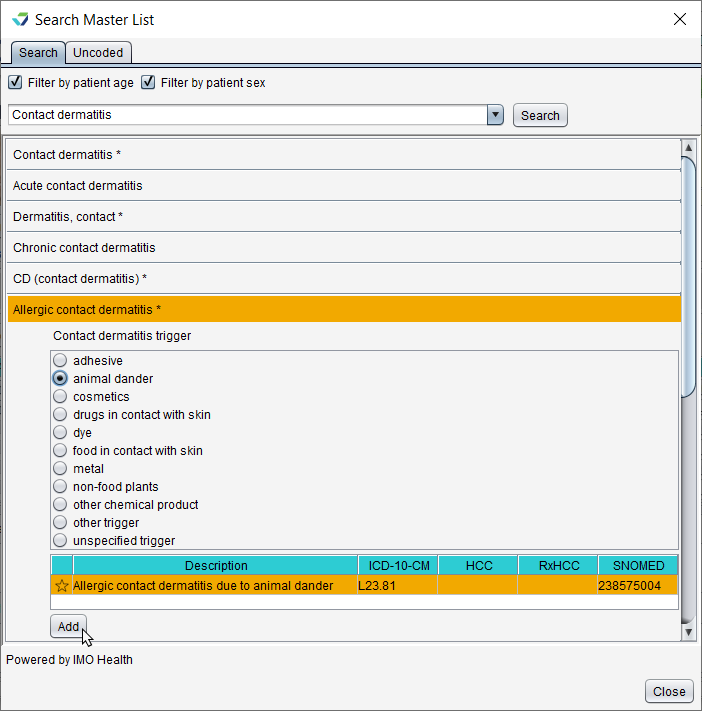
Populate the Onset Date or leave defaulted to the encounter date
If the onset date is unknown, select Existing Assessment
Optional: select a Progress status
Optional: populate the Note field to document any additional information
Optional: populate the Encounter Note field to document additional information for the current encounter
Click Add or click Add Another and repeat the steps to add more assessments
Assessments added to the encounter are automatically marked as Billed and Assessed.
Assessment Note and Health Concerns
Assessment Note and Health Concerns are free text fields used to document additional information or concerns as they relate to the assessment(s) of the current visit. The information documented in these fields is encounter-specific and does not carry forward to subsequent visits.
No Active Problems
The No active problems checkbox is used for patients who have no active problems and can be used in conjunction with ICD‑10 codes for the reporting of factors influencing health status and contact with health services (Z codes).

The checkbox will display as disabled for patients with active problems that are not Z codes.
View Historic Assessments
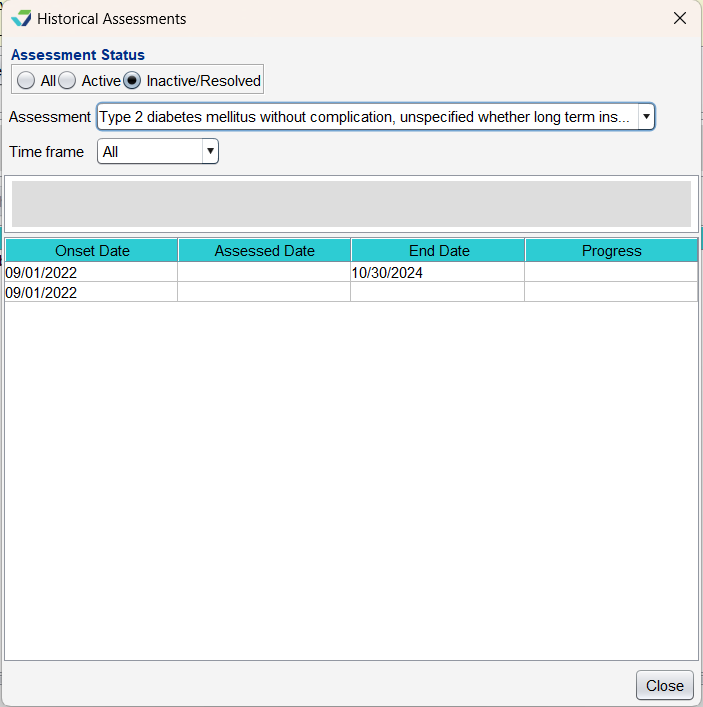
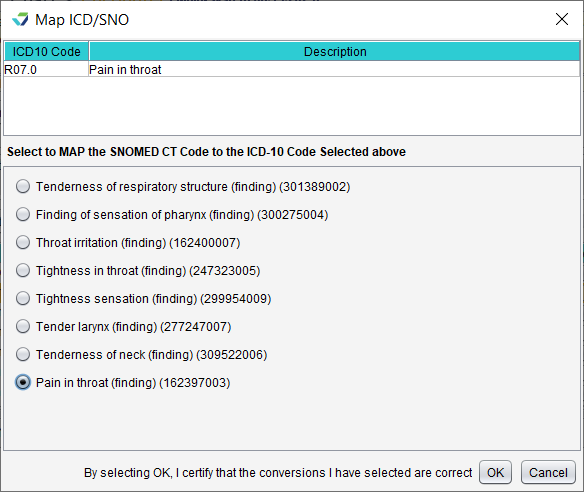
Map an ICD-10 Code to a SNOMED CT Code
Mapping is only available for ICD-10 codes that do not have an associated SNOMED CT code.
- Select a Problem
- Click Map SNO
- Select a SNOMED CT for mapping
- Click OK
Tasks Associated with Assessments
Inactivate a Problem
Select the problem and click Inactivate. The problem will display in orange text until the encounter is finalized and will not display in any subsequent encounters.

Resolve a Problem
Select the problem and click Resolve. If a Resolved Date is required, populate the date the problem was resolved and click OK.
The problem will display in grey text until the encounter is finalized and will not display in any subsequent encounters.

Note
If a Resolved Date is not required, the date of the encounter is used as the Resolved date on the encounter note.
Delete a Problem
Select the problem and click Delete, then click Yes to confirm decision to delete
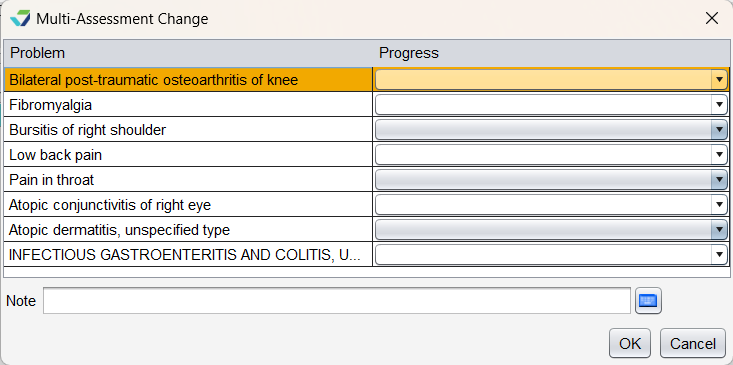
Edit the Problem List
Click Edit List to update the Progress, or Note of one or more problems on the list
Organize the Problem List
 Select an item and click the Up arrow to move the item up one place in the list
Select an item and click the Down arrow to move the item down one place in the list
What’s the Difference Between Inactivating, Resolving, and Deleting a Problem?
Delete is only available when a problem is added in the current encounter and should be used to remove a problem that has been added in error or is not needed. A deleted problem does not display on the encounter note.
Resolve should be used when a problem no longer exists for the patient. Resolved problems should be documented with a date of resolution. A resolved problem displays as Resolved on the encounter note with a resolution date.
Inactivate should be used for ICD‑10 codes for health status or health services (e.g., certain Z codes) or to remove problems from a patient’s chart as part of a clinical reconciliation. An inactivated problem does not display on the encounter note.