QRDA files are used for quality report data submission to government incentive programs and other regulatory programs and are accepted by most Healthcare IT systems, such as registries.
There are two types of QRDA formats, both of which are available in Sevocity:
QRDA Category I: contains data on an individual patient for the selected measure
QRDA Category III: aggregates data for all patients included in the selected measure
The Consolidated QRDA Export tool exports one or more eCQM reports in QRDA Category I and Category III format.
Create a Consolidated QRDA Export File
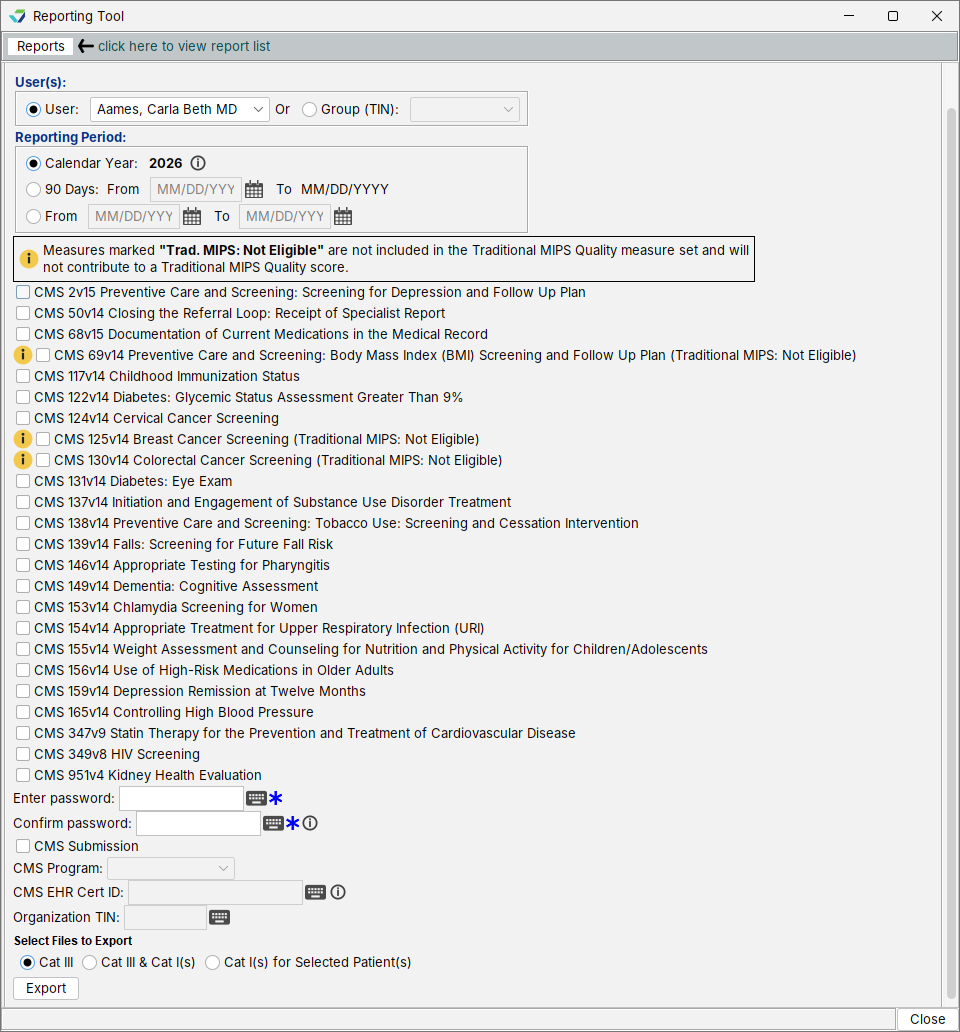
From the Reporting Tool, go to Reports > eCQMs > 2026
Click Consolidated QRDA Export
Select a Provider (User) or provider Group (listed by TIN)
Select a Reporting Period:
Calendar Year: will report data from January 1 of the calendar year listed through the current date
90 Days: will report data for a continuous 90 day period, calculated based on the From date
Custom date range: will report data based on a specific date range (From–To)
Select one or more measures for the export
Create and verify a password by populating the Enter password and Confirm password fields
Password must be alphanumeric with a minimum of 5 characters
Password is used to encrypt the data export and will be required to open the file
If submitting the file(s) for MIPS reporting, select the CMS Submission checkbox
Select MIPS Individual or MIPS Group from the CMS Program field
The Organization TIN field will automatically populate from the user profile based on the CMS Program selected
Select the QRDA file type to export
Selecting Cat I(s) for Selected Patient(s) will require the user to select the patient for this export
Click Export
Select a location to save the file and click Open to save
The QRDA files will be saved in a compressed (zipped) folder.
How Do I Obtain a CMS EHR Certification ID?
Providers can generate their CMS EHR Certification ID from the ONC Certified Health IT Product List (CHPL) website using the CMS ID Creator tool. Instructions for generating a CMS ID can be located on the CHPL site. Note: Providers must select all certified products or modules used during the performance period for which they are submitting data when creating their ID. A list of eligible certified products and modules for Sevocity can be located here.
How Do I Access My Exported QRDA Files?
The Consolidated QRDA Export is saved in a compressed (zipped) folder, and the files will need to be extracted using a compressed file utility that can unzip encrypted folders.
Sevocity Best Practice
For Windows OS users without a compressed file utility, Sevocity recommends using 7-Zip. 7-Zip is free to use and can be downloaded at https://www.7-zip.org. For macOS users without a compressed file utility, Sevocity recommends using The Unarchiver. The Unarchiver is free to use and can be downloaded at https://theunarchiver.com or from the Mac App Store.
Extract QRDA Files Using 7-Zip
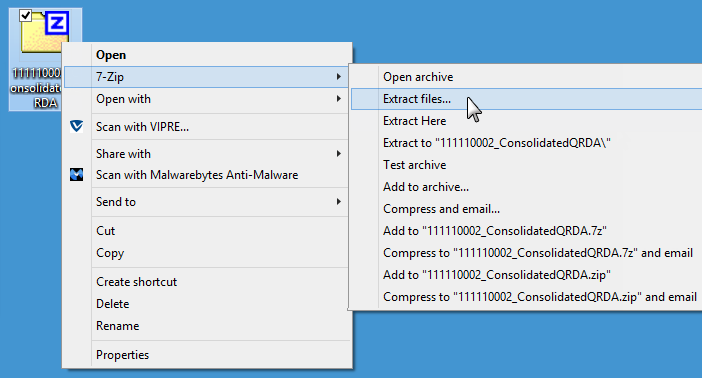
Right-click the folder
Select 7-Zip and then click Extract files…
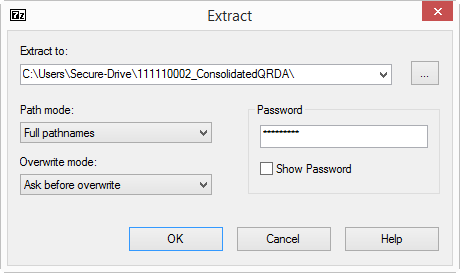
Specify a location for the extracted files in the Extract to field
Type the password specified when creating the QRDA export in the Password field
Click OK
OR
Double-click the folder
Click the Extract icon ()
Specify a location for the extracted files in the Copy to field
Click OK
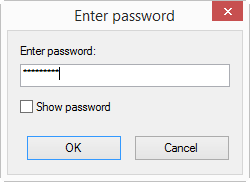
Type the password specified when creating the QRDA export in the Enter password field
Click OK
Extract QRDA Files Using The Unarchiver
Right-click the folder
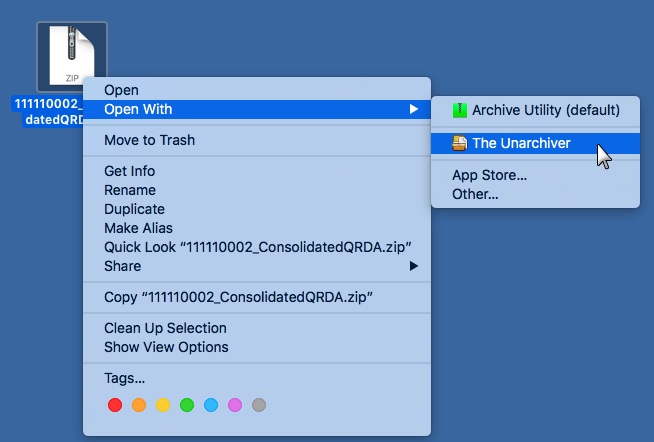
Select Open With then click The Unarchiver
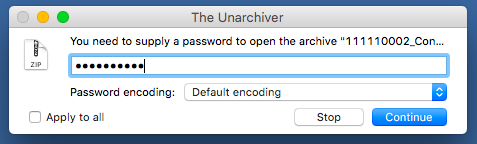
Type the password specified when creating the QRDA export in the free text field