
The Clinical Decision Support tool creates intervention protocols to manage the clinic’s patient population.
Permissions
Clinic Administrator privileges are required to create Clinical Decision Support and enable encounter-level alerts
To add, change, or override a patient’s Clinical Decision Support at the chart level, a user must have Can enable CDS Interventions selected in their user profile
Create a Clinical Decision Support
Go to Tools > Preferences > CLINIC > Clinical Decision Support > Begin Edit
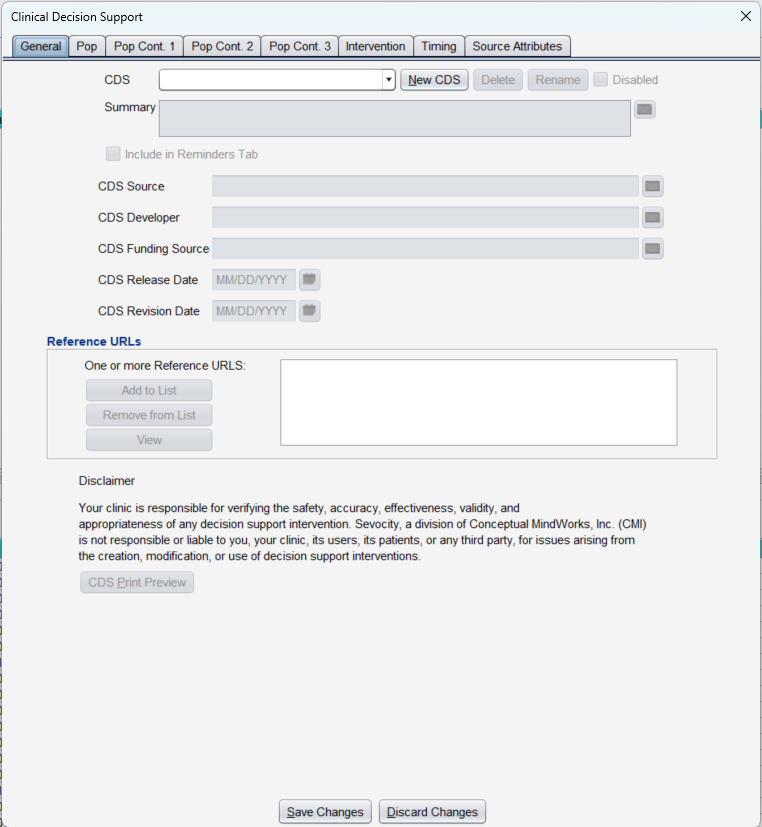
General Tab
From the General tab:
Click New CDS
Type a Name for the CDS
Click Save
Optional: select Include in Reminders Tab to use the guideline for Patient Reminders
Optional: populate the following information for the guideline: Summary, CDS Source, CDS Developer, CDS Funding Source, CDS Release Date, CDS Revision Date, Reference URLs: Click Add to List, type the website Reference URL, and click Save. Repeat to add more URLs
Click the Pop tab to continue creating the Clinical Decision Support
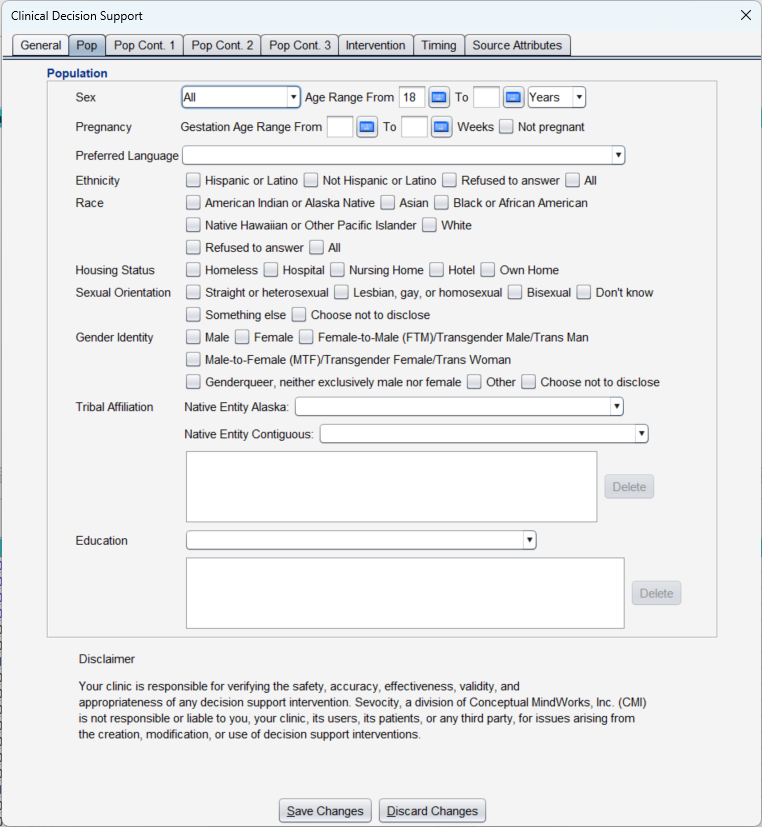
Population Tab
From the Pop tab:
Select Sex
Optional: add one or more of the following demographic criteria to further define the population:
- Age (Years or Months)
- Gestation Age
- Preferred Language
- Ethnicity
- Race
- Housing Status
- Sexual Orientation
- Gender Identity
- Education
- Click the Pop Cont. 1 tab to continue creating the CDS
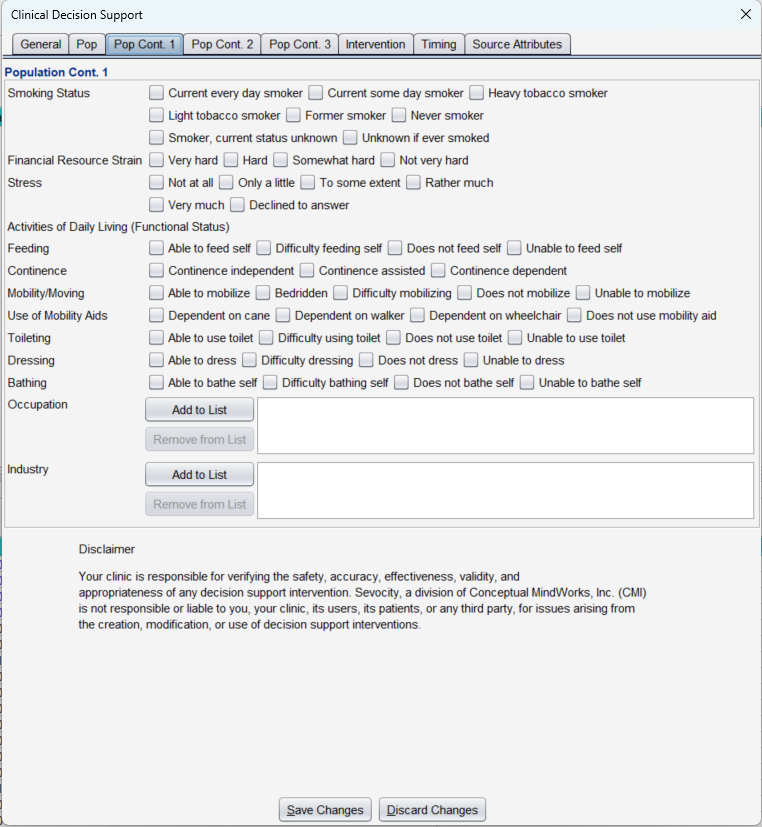
Population Cont. 1
Clinical criteria can be specified in the Pop Cont. 1 tab to further define the population, but it is not required to create a CDS.
From the Pop Cont. 1 tab, add one or more of the following:
- Smoking Status
- Financial Resource Strain
- Stress
- Activities of Daily Living (Functional Status)
- Occupation
- To include patients with a specified occupation, click Add to List and search for the occupation.
- To remove an occupation from the list, select it and click Remove from List. Then confirm that you would like to delete the item.
- Industry
- To include patients with a specified industry, click Add to List and search for the occupation.
- To remove an occupation from the list, select it and click Remove from List. Then confirm that you would like to delete the item.
Click the Pop Cont. 2 tab to continue creating the CDS
Population Cont. 2
Clinical criteria can be specified in the Pop Cont. 2 tab to define the population further, but this is not required to create a Clinical Decision Support.
From the Pop Cont. 2 Tab, add one or more of the following:
- SDOH Problems/Health Concerns
- Include: to include patients with a specified SDOH problem, click Add to List and select one or more codes from the list. Click Save to add the code(s).
- Remove: to remove an SDOH problem, select the problem(s) from the list and click Remove from List. Then confirm you would like to delete the item
- Standard Flowsheet Score (Screening Assessment)
- Include: to include patients with a screening assessment within a specific range, click Add to List and select the screening assessment.
- A Low and High score range is required for each assessment selected
- Click Save to Add
- Remove: to remove a Flowsheet from the list, select the assessment from the list and click Remove from List. Then confirm you would like to delete the item.
- The flowsheet scores will have a lookback period of 2 years from the current date. The latest flowsheet score found in the patient’s chart will be used for the CDS’s population.
- Include: to include patients with a screening assessment within a specific range, click Add to List and select the screening assessment.
- SDOH Goals
- Include: to include patients with a specific SDOH goal(s), click Add to List and select one or more of the goal(s) from the list. Click Save to add the goal(s).
- Remove: to remove an SDOH goal, select the goal(s) from the list and click Remove from List. Then confirm you would like to delete the item.

Population Cont. 3
Clinical criteria can be specified in the Pop Cont. 3 tab to further define the population, but it is not required to create a clinical decision support.
From the Pop Cont. 3 tab, add one or more of the following:
- Diagnoses (ICD-10)
- Include: to include patients with a specific diagnosis, click Add to List and select one or more codes from the Assessment Favorites List or use Search Master List to select from all codes. Click Save to add the codes.
- Exclude: to exclude patients with a specific diagnosis, click Add to List and select one or more codes from the Assessment Favorites List or use Search Master List to select from all codes. Click Save to add.
- E-Lab Results
- Click Add to List and select a result field from the list
- A Low or High result value is required for each lab result selected
- Click Save to add.
- Click Add to List and select a result field from the list
- Medication
- Click Add to List and select one or more medications from the list
- Click Save to add
- Medication Allergies
- Click Add to List and select one or more medication allergies from the list
- Click Save to add
- Implantable Devices
- Click Add to List and select Company/Brand/Model/DI or Device Name to display active implantable devices
- Select a device from the list and click Save to add
- Procedure
- Click Add to List and select one or more codes from the Orders Favorites list or use Search CPT Master List or Search HCPCS Master List to select from all codes
- Click Save to add
- Vitals
- Click Add to List and select a vital sign from the list
- A High value is required for each vital sign selected
- Click Save to add
- Click Add to List and select a vital sign from the list

Click the Intervention tab to continue creating the Clinical Decision Support
Intervention Tab
Orders
Orders are documented in the Orders/Procedure encounter tab
Click Add to List and select one or more codes from the Orders Favorites list or use Search CPT Master List or Search HCPCS Master List to select from all codes
Click Save to add
Custom Flowsheet Values Recorded
Custom flowsheet values are documented in the Flowsheet/Labs encounter tab and in the Flowsheet/Labs chart tab
Click Add to List and select one or more flowsheet components from the list
Click Save to add
Structured VS or Standard Flowsheet Values Recorded
Structured vital signs are documented in the Vitals encounter tab and in the Vitals or Vitals/Growth Charts chart tab
Click Add to List and select Vitals from the Standard Flowsheet list
Select one or more vital signs and click Save to add
Standard flowsheet values are documented in the Flowsheet/Labs encounter tab and in the Flowsheet/Labs chart tab
Click Add to List and select a flowsheet from the Standard Flowsheet list
Select one or more flowsheet components from the list and click Save to add
Immunizations
Immunizations are documented in the Immunizations encounter tab
Click Add to List and select one or more immunizations from the list
Click Save to add.
Z Codes
Z codes are documented in the Assessment encounter tab
Click Add to List and select one or more codes from the list or use Search Text or Search Code to find a code
Click Save to add
Click the Timing tab to continue creating the Clinical Decision Support

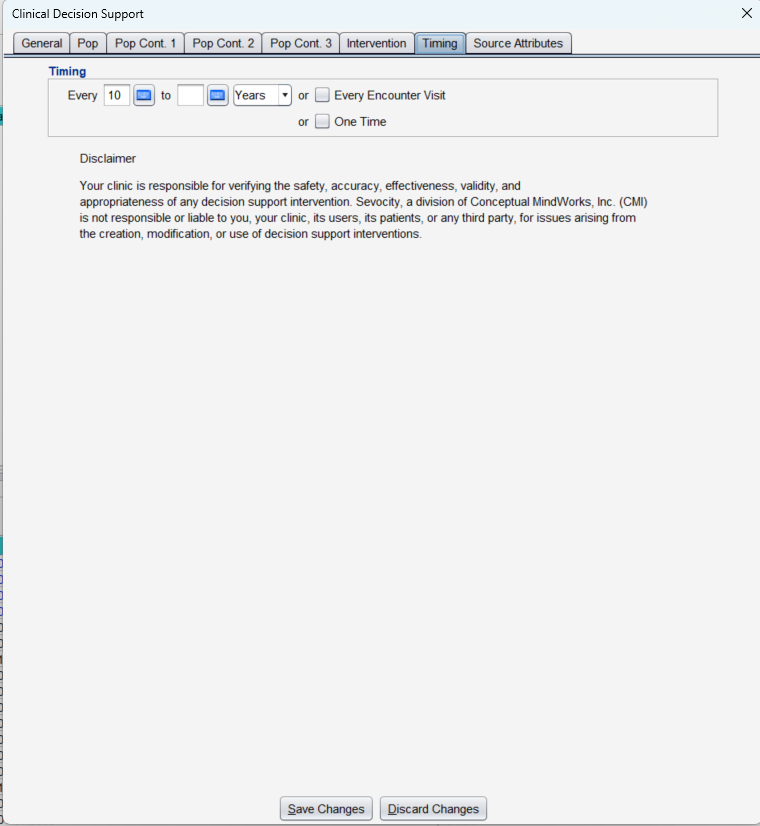
Timing Tab
From the Timing tab:
Specify the time period during which the intervention needs to be performed:
- Days, Months or Years: type a range (e.g., 1–2 Years) or an exact interval (e.g., 6 Months)
- If using an exact interval, type the number in the first numeric field
- Every Encounter Visit: an intervention is required at every visit
- One Time: an intervention is required only once
- Days, Months or Years: type a range (e.g., 1–2 Years) or an exact interval (e.g., 6 Months)
Optional: click the Source Attributes tab to view the guideline source information and criteria
Click Save Changes to finish creating the Clinical Decision Support
After creating or modifying a Clinical Decision Support, a user must log out of Sevocity and log back in for the changes to take effect
Tasks Associated with Clinical Decision Support
View a Clinical Decision Support
To view the information in a Clinical Decision Support:
From the General tab, select a CDS from the list
Click CDS Print Preview to display the guideline in a PDForClick the Source Attributes tab to view the CDS
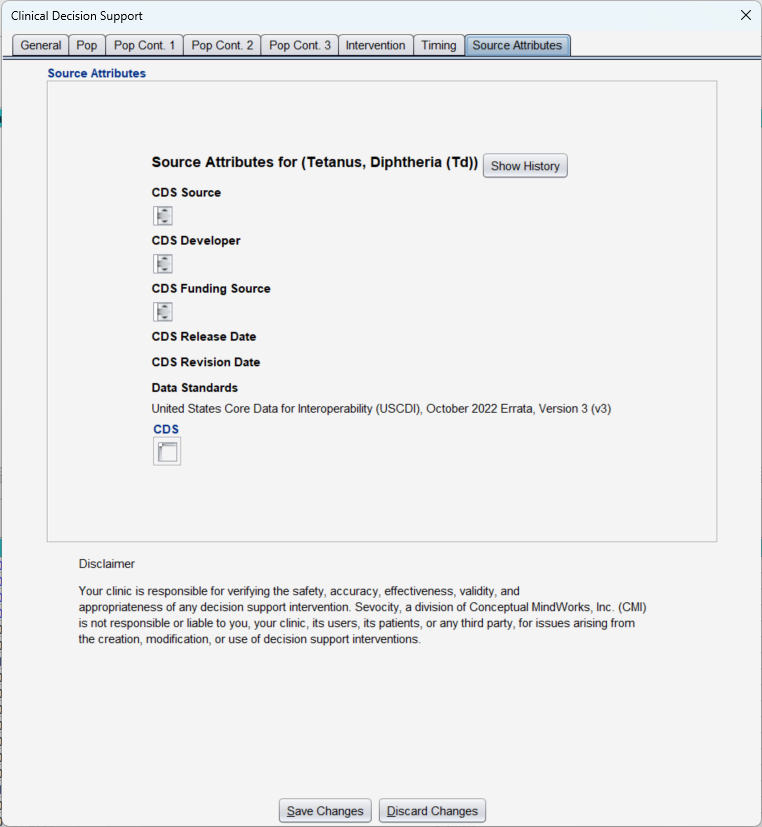
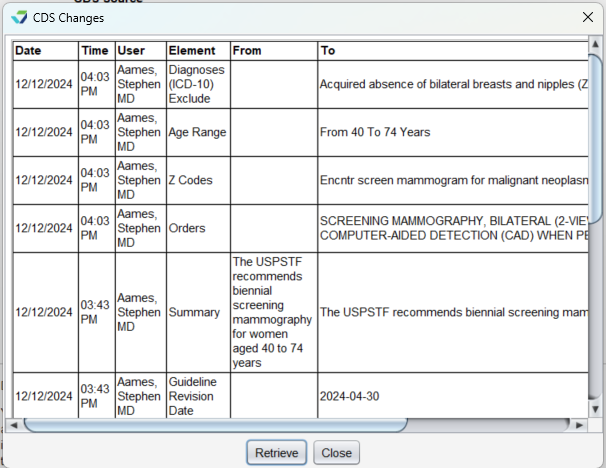
To view changes made to a Clinical Decision Support:
From the General tab, select a CDS from the list
Click the Source Attributes tab
Click Show History
Click Retrieve
Update a Clinical Decision Support
- From the General tab, select a CDS from the list
- Edit information in the General, Population, Population Cont. 1, Pop Cont. 2, Pop Cont. 3, Intervention, or Timing tabs
- Click Save Changes
Rename a Clinical Decision Support
- From the General tab, select a CDS from the list
- Click Rename
- Click Yes to confirm the renaming of the CDS
- Type a Name for the CDS and click Save
- Click Save Changes
Renaming a Clinical Decision Support moves the CDS to the end of the selection list.
Disable a Clinical Decision Support
- From the General tab, select a CDS from the list
- Select the Disabled checkbox
- Click Save Changes
Disabling a Clinical Decision Support preserves all the information in the CDS but removes it from use. The guideline will remain visible in the selection list and can be reactivated by clearing the Disabled checkbox.
Delete a Clinical Decision Support
- From the General tab, select a CDS from the list
- Click Delete
- Click Yes to confirm the decision to delete
- Click Save Changes
Once deleted, a Clinical Decision Support cannot be restored.
Clinical Decision Alerts
CDS alerts can be enabled to display in Multi-System and Exam encounters. See Clinic Settings: Alerts/Reminders/CDS
If a patient requires an intervention for a Health Guideline, the CDS Alerts window will display upon creating or accessing an encounter. The CDS that apply to the patient will be listed in the alert message. Clicking OK on the alert window closes the window; it does not satisfy the CDS intervention requirement.

The required interventions (Care Suggestions) for each guideline can be viewed from the CDS tab in the patient chart.