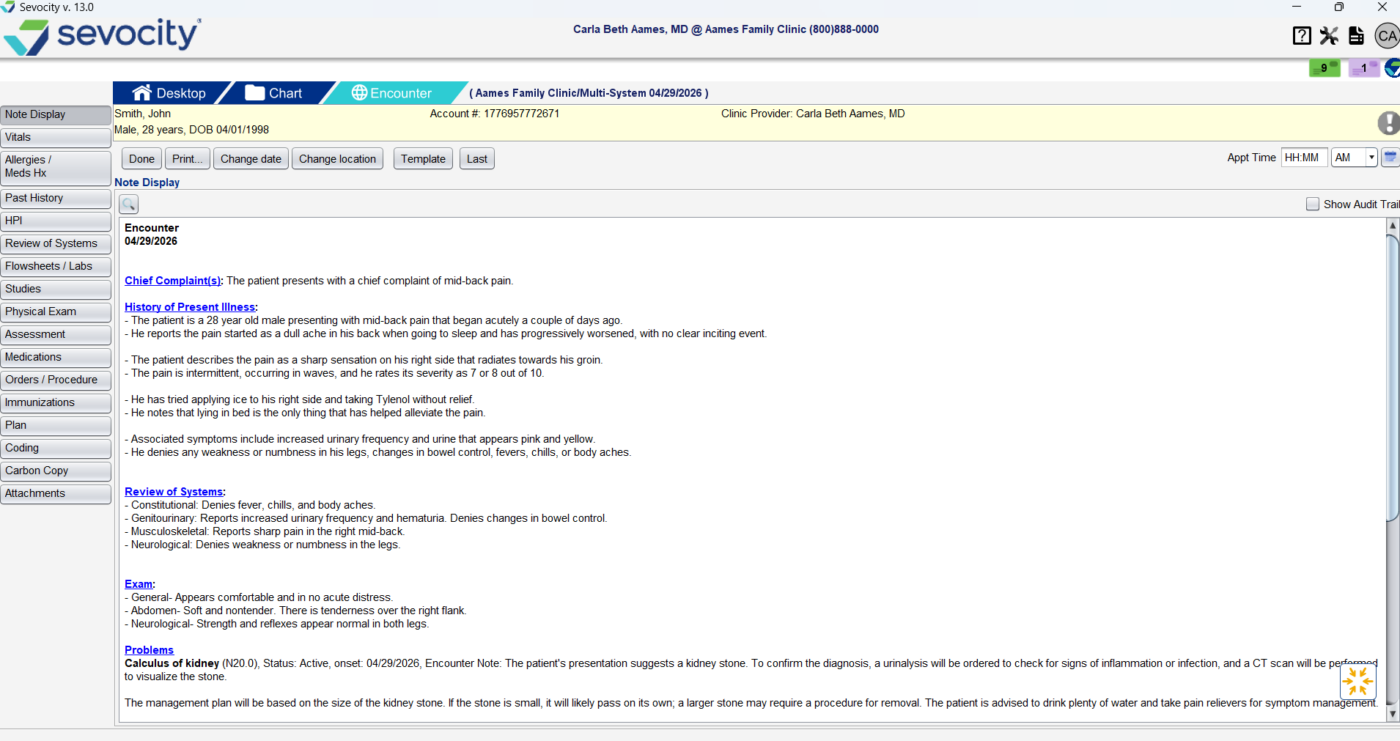
Sevocity has partnered with Suki to bring ambient listening to our clinicians. Providers can utilize Suki to capture the patient-provider conversation during an encounter visit which will then draft clinical documentation. This draft documentation can be reviewed and edited prior to submitting to Sevocity.
To register for Ambient Listening (Suki) and watch a short video demonstration, please click here.
Supported Encounter Types
- Multisystem/Exam Encounter
- Procedure Encounter
- Urgent Care Encounter
- OB Initial Visit
- OB Follow-Up
- Postpartum Visit
Updating Patient Consent
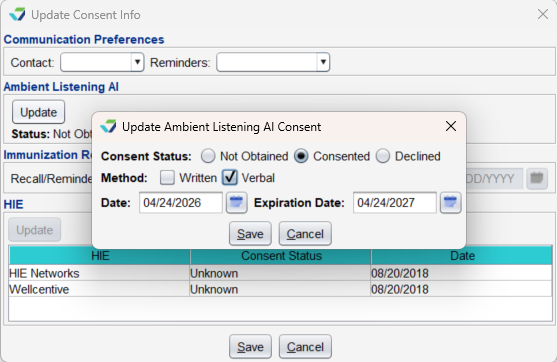
Patient consent documentation is necessary for the clinician to be able to utilize Ambient Listening (Suki) for that patient’s encounter.
- Open the patient’s Chart
- Navigate to Demographics > Consents
- Select Update.
- Under Ambient Listening AI and click Update.
- Choose Consent Status:
- Consented
- Not Obtained
- Declined
- Choose the Method:
- Written
- Verbal
- Enter the Consent Date
- Optional: Enter Expiration Date
- Select Save
Notes
Any authorized clinic user can update the patient consent. This action is not restricted to providers.
Understanding Suki Consent Status Indicators
When an encounter is opened, the suki icon displays the patient’s current consent status.
| Icon | Status |
|---|---|
 | Patient has active consent |
 | Consent is not obtained or expired |
 | Consent declined |
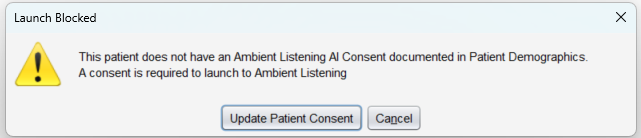
If consent has not been obtained or has expired, Sevocity prompts users to obtain or update consent.
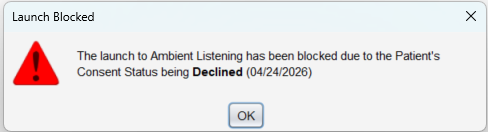
If consent has been declined, providers receive a notification explaining that Suki is unavailable due to the patient’s consent status.
Documenting an Encounter with Suki
- Open the patient’s encounter
- Select the Suki icon in the lower-right corner of the encounter.
- Confirm the icon is green, indicating active consent.
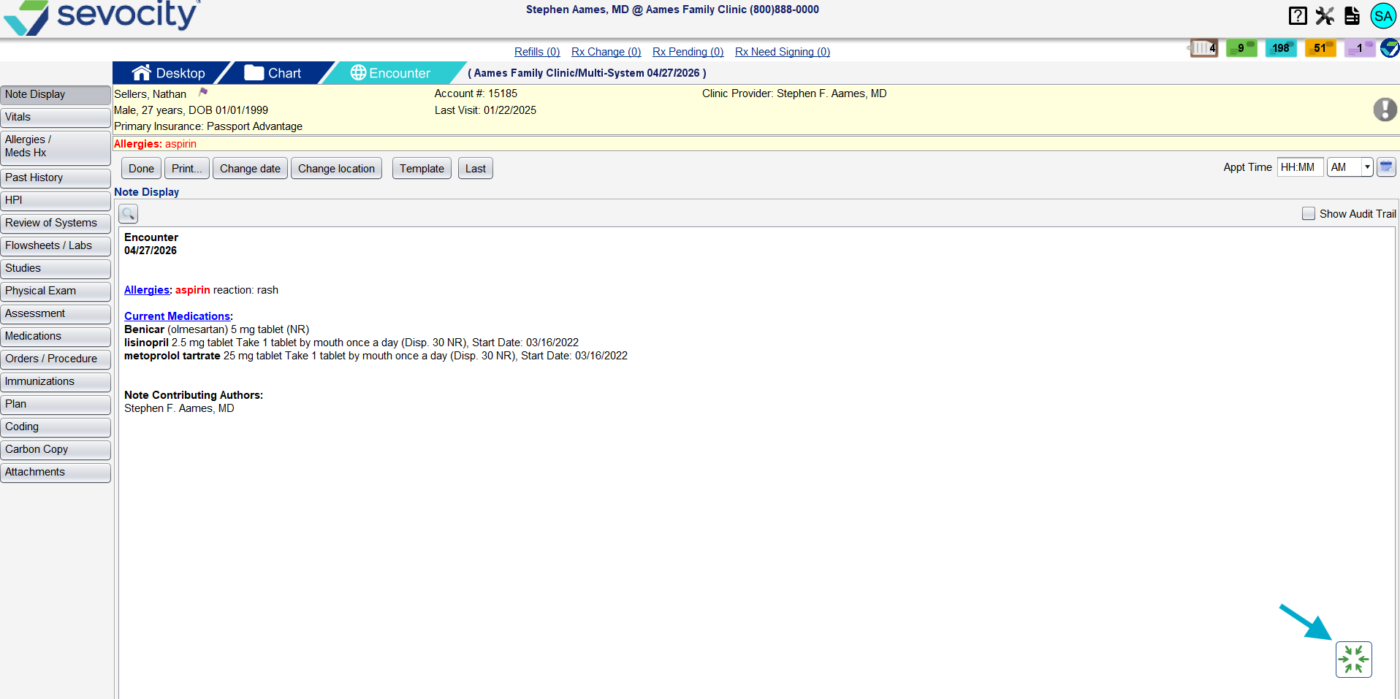
- Sign in using Sevocity Username and Password (Every 14 days)
- Select microphone
- The current patient’s First Initial, Last Name Age, Gender and DOB is Displayed on the Suki window.
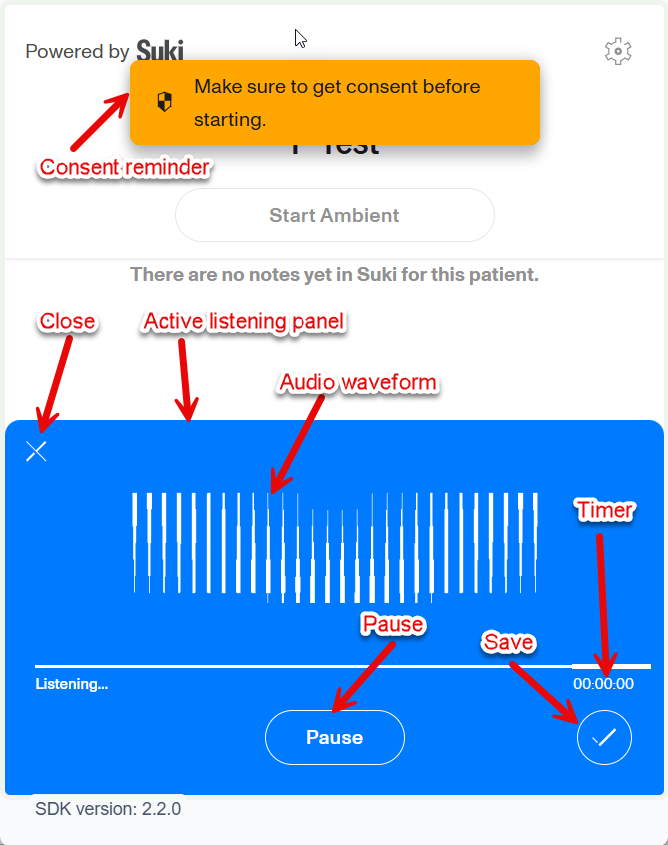
- Select Start Ambient Listening.
- Select Pause to pause ambient listening.
- Click the checkmark to complete ambient listening.
Formatting and Verbosity Settings
- To change Formatting click on the gear icon, then select Note Style
- Formatting – Choose between Bulleted and Narrative
- Verbosity can be changed from Note Style
- Concise: Generates shorter, streamlined notes that capture only the most essential information, reducing the need for extensive editing.
- Balanced: Provides a standard, well-rounded clinical note with an appropriate level of medical detail.
- Detailed: Provides a standard, well-rounded clinical note with an appropriate level of medical detail.
Reviewing and Editing Suki Notes
After the note generates, providers can review and modify the draft before submitting it to Sevocity. The note will remain in Draft status until it is submitted to Sevocity.
- Review the Suki-generated note
- Edit using free text, dictation, or ambient listening
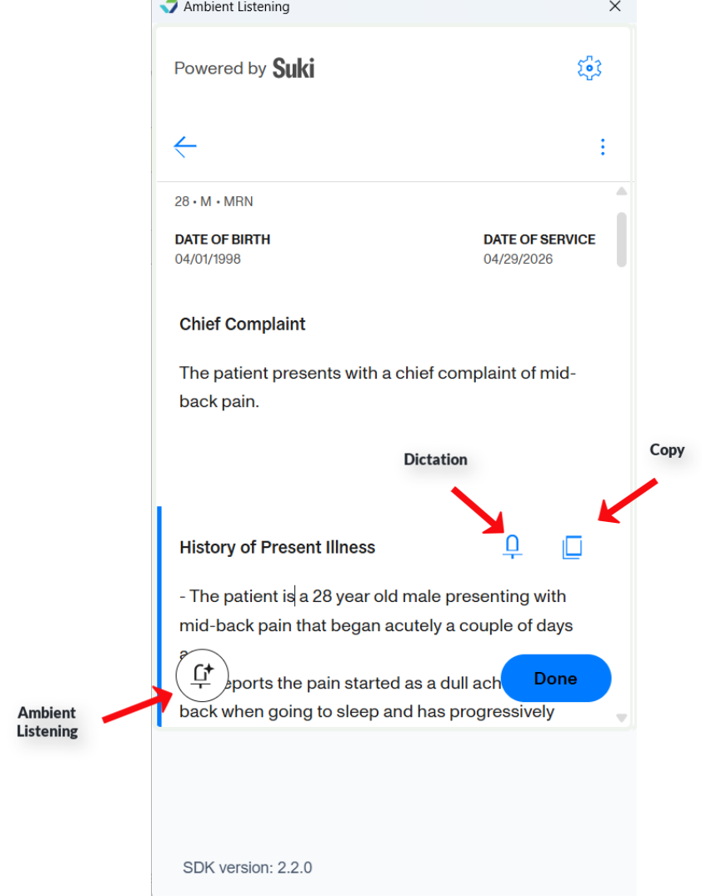
- In the Assessment section, click Add Code to search and select ICD-10 codes
- Select Done.
Note
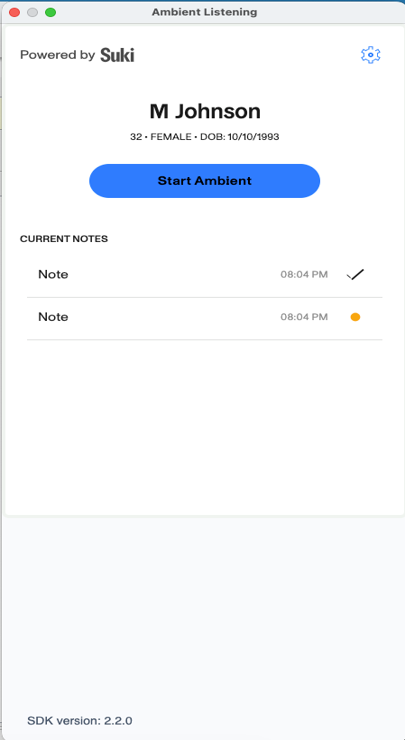
- If any prior Suki sessions exist for this patient’s encounter, they will be shown in list format.
- Unsubmitted Notes: Only the clinician who created an unsubmitted Ambient Listening (Suki) note can see it when it has not yet been submitted to Sevocity. These notes remain private to that clinician. Unsubmitted Notes are indicated with an Orange Dot and remain editable until submitted to Sevocity.
- Submitted Notes: Notes that have been submitted to Sevocity become shared notes and are visible to all clinicians with access to Ambient Listening (Suki). Submitted Notes are indicated with a Black Check Mark and have been submitted to Sevocity. These notes are no longer editable but can be copied.
The generated content is automatically populated into the appropriate sections of the encounter, including:
| Suki | Sevocity |
|---|---|
| Chief Complaint | Chief Complaint |
| History of Present Illness | HPI (Narrative) |
| Past Medical History | PFSH (Notes) |
| Past Surgical History | PFSH (Notes) |
| Family History | PFSH (Notes) |
| Social History | PFSH (Notes) |
| Review of Systems | Review of Systems (Notes) |
| Physical Exam | Physical Exam (Notes) |
| Assessment | Assessment |
| Plan | Plan |
| Procedure | Procedure (Summary) |
| Patient Instructions | Patient Instructions |
| Disposition | Disposition |
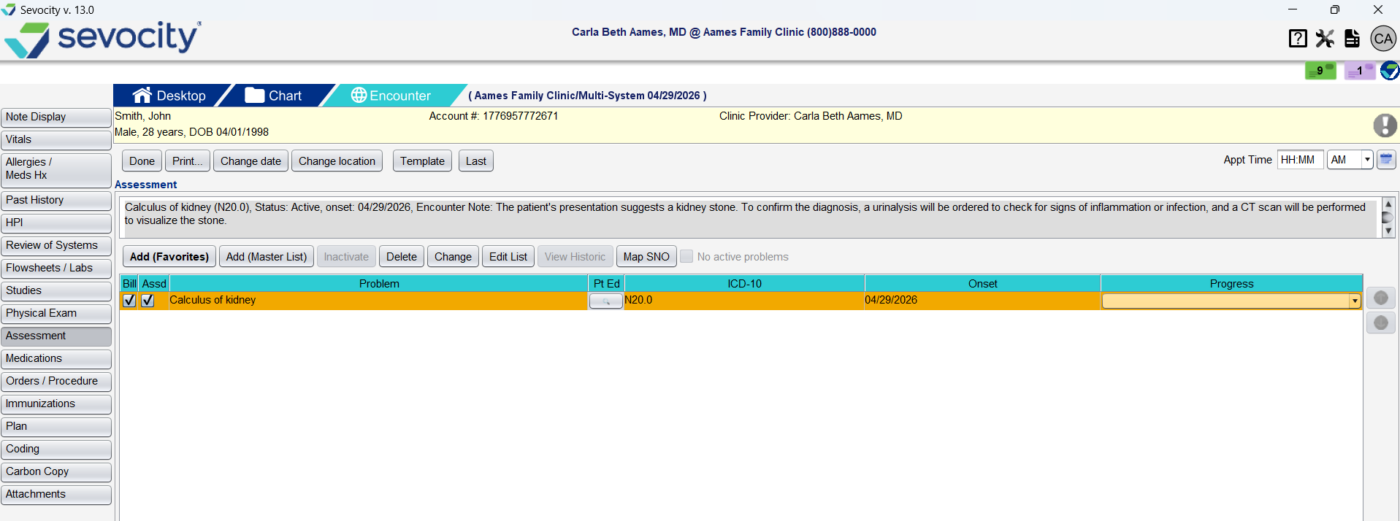
How Assessments are Mapped
- Assessment information is transferred to Sevocity using both structured and narrative documentation.
- Diagnoses selected in Suki are sent to Sevocity as structured entries.
- These entries are mapped to the ICD-10 problem list within the Assessment section of the encounter.
- General Assessment comments are documented in the Assessment Note section.
- Narrative associated with specific diagnosis is entered into that diagnosis’s Encounter Note field.
- The diagnosis is automatically marked as billed.
- If a problem already exists in Sevocity, the existing problem is reused.
- The problem is marked as assessed and billed.
Finalizing the Encounter
- Review the encounter in Sevocity.
- Prescribe Medications if necessary.
- Add any necessary Orders/Referrals
- Complete Coding if necessary
- Finalize the encounter.