The Task List and Messages inbox display tasks and messages sent to a user by another clinic user.
Permissions
To view and manage all user tasks in the clinic, a user must have Tasks selected in their user profile.
Configuration
To receive an email notification when a new Message is received, a user must have When message received in User Messages selected in their user profile
To receive an email notification when a new Task is received, a user must have When task received in User Task List selected in their user profile
Message and Task Groups are customizable at the user and CLINIC level. Go to Tools > Preferences > CLINIC or [user] >Application Settings > Message/Task Groups
Message Subject and body favorites can be customized by the Clinic Administrator by going to Tools > Preferences > CLINIC> Clinic Wide Form Data > Begin Edit and selecting Messaging from the Tab list
Selection items for the Task Subject list and Task Description Add From Favorites list are customizable at the user and CLINIC level. Go to Tools > Preferences > CLINIC or [user] > Form Data > Begin Edit and select Task List from the Tab list
Task List
Tasks are duties assigned to another user or group of users in the clinic. Tasks can be created directly from the task list or assigned as part of another workflow, such as Referrals.
Task List Display
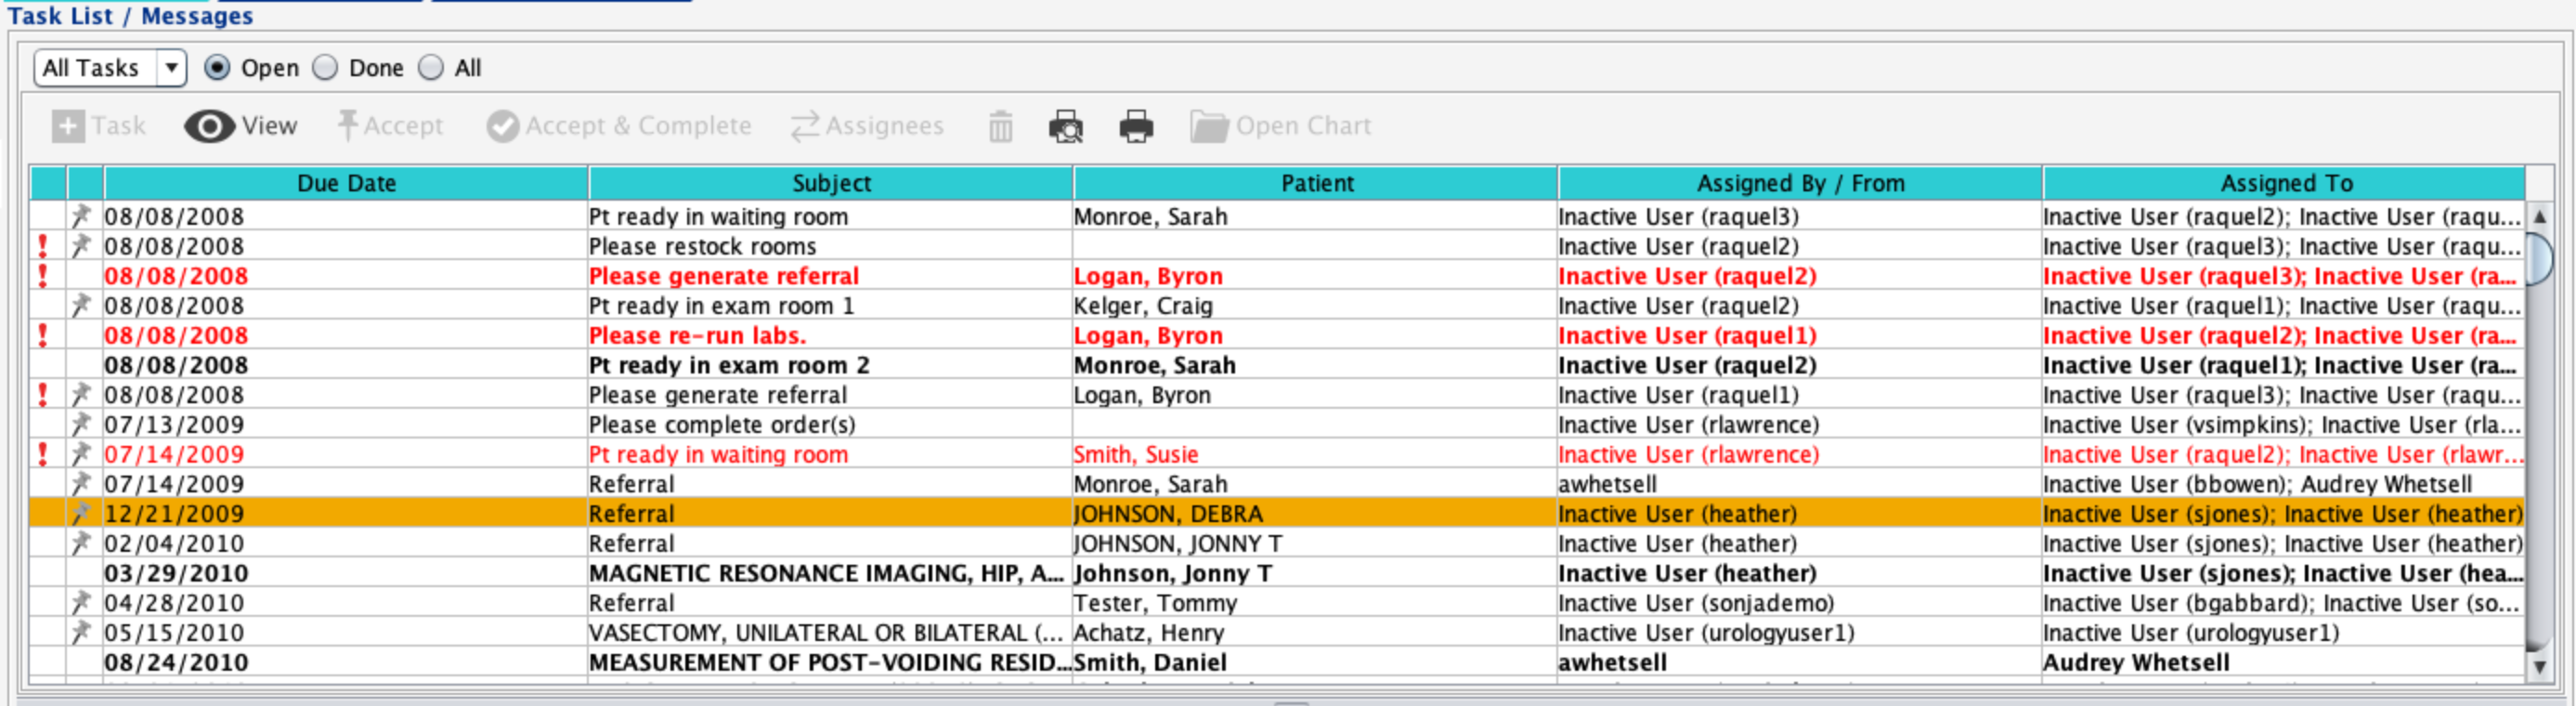
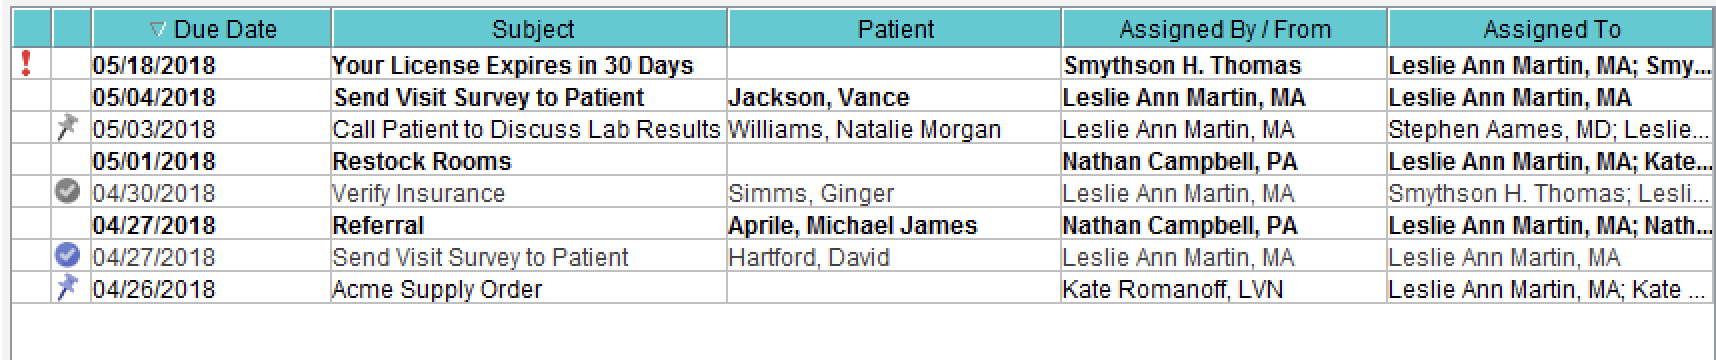
The Task List displays tasks both created by and assigned to the user and can be filtered to display tasks that have not been completed (Open), completed tasks (Done), or All tasks. The task list defaults to the Open task filter.
Users with Task AdministratorSevocity user responsible for monitoring and managing assigned tasks for all users in the clinic privileges have an additional filter to display only their tasks (My Tasks) or All Tasks in the clinic. The Task Administrator filter defaults to My Tasks.
The following information displays for each task: Due Date, Subject, Patient name, the user who assigned the task (Assigned By/From), and the user(s) the task was Assigned To.
Tasks that have not been accepted display in bold face text
A red exclamation point displays next to tasks with a priority of Urgent
Tasks with a priority of Critical display in red text
Click Open Chart to open the chart of the patient associated with a task
The Open Chart button is only enabled when a patient is associated with the task
Task Status Icons denote the progress of a task:
Blue thumb tack (): the user has accepted the task
Grey thumb tack (): another user has accepted the task
Blue check mark (): the user has completed the task
Grey check mark (): another user has completed the task
A clipboard icon () will display in the notifications area when a new task is received. Double-clicking on the notification icon will navigate the user to the Task List/Messages tab.
Note
The number that appears on the icon is the number of new or unaccepted tasks in the Inbox. If there are no new or unaccepted tasks in the Inbox, the icon will not be visible
View Tasks
To view task details, select the task and click View or double-click the task.
For unaccepted tasks, the task details and the Accept and Accept and Complete buttons display
For accepted and completed tasks, the task details and any subsequent activity details display
Create a New Task
Go to Desktop > Task List/Messages
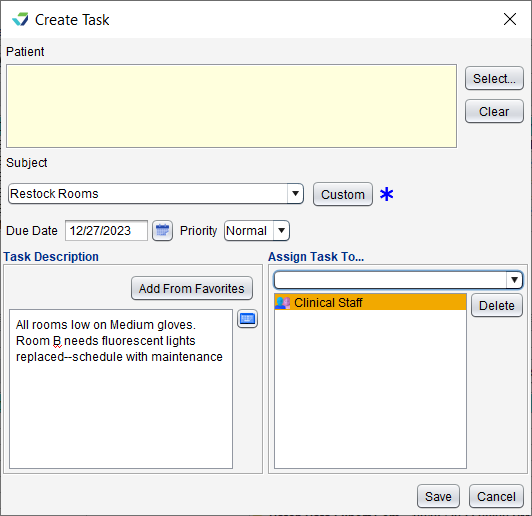
Click Create from the Task List
Optional: click Select to search for and select a patient to associate with the task
Select a Subject from the selection list or click Custom and type a subject
Populate a Due Date for the task or leave defaulted to the current date
Select a Priority for the task or leave defaulted to Normal
Populate the Task Description
Click Add from Favorites and select one or more items from the list or type the task description in the free text field
Search for and select a user or group for task assignment
Multiple individual users, multiple groups, or a combination of users and groups can be selected
To create a task assigned to oneself, do not select any users
Click Save
Update a Task
Select a task and click Accept to take ownership of the task
Select a task and click Accept and Complete to mark the task as completed
To change the users assigned to a task, select the task and click Change Assignees
Select one or more users from the Unassigned Users column and click to move to the Assigned Users column
or
Select one or more users from the Assigned Users column and click to move to the Unassigned Users column
Select an accepted task and click Complete to mark the task as completed
Select an accepted task and click UnAccept to change the task status to unaccepted
Note
To manage a task that has been accepted by another user, the Task Administrator must click Change Assignees and remove the user from the task before it can be updated
Delete Tasks
Task Administrators can delete any task from the All Tasks view. Tasks deleted by the Task Administrator will be removed from all assigned users’ task lists. For users without Task Administrator privileges, only tasks in the Done view can be deleted.
To delete a task, select the task and click Delete. To delete multiple tasks, hold down the CTRL key and select individual tasks or hold down the SHIFT key to select a range of tasks and click Delete.
A message will display to verify the user would like to discard the task. Click Yes to delete.
Warning
Once deleted, a task cannot be retrieved or restored
Messages
Message are used to communicate with another user or group of users in the clinic. Messages can be created directly from the Messages inbox or sent as part of another workflow, such as documenting Encounters. Messages can also be system-generated from features such as Patient Reminders.
Messages Inbox Display
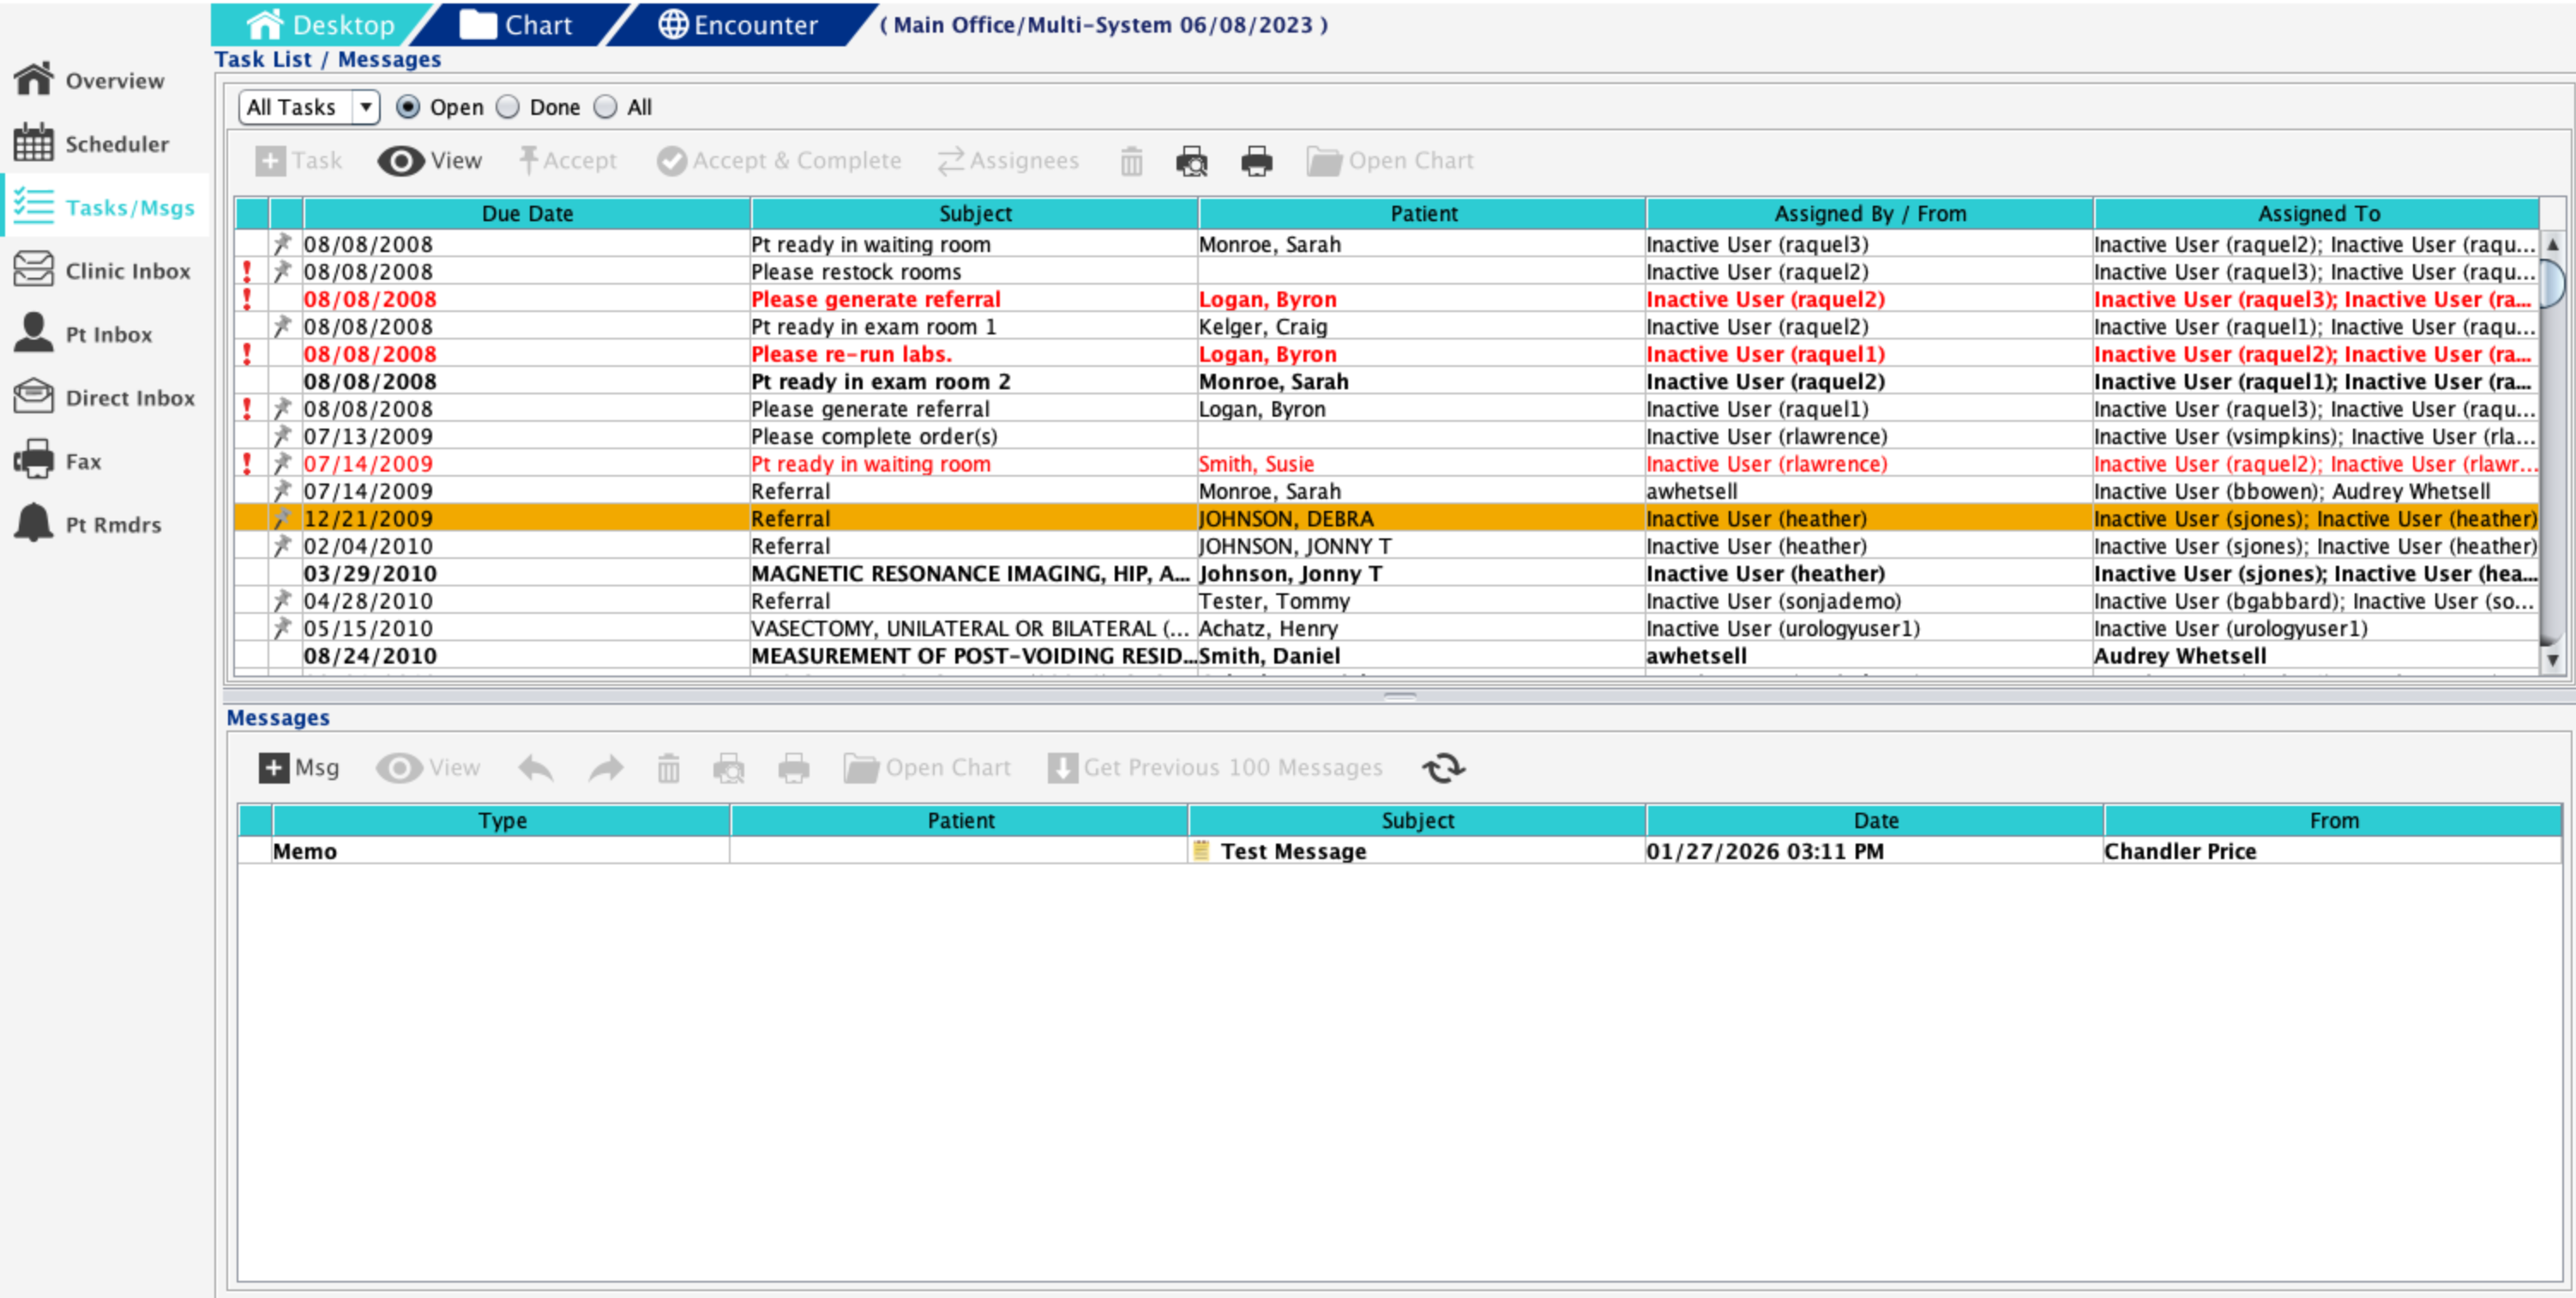
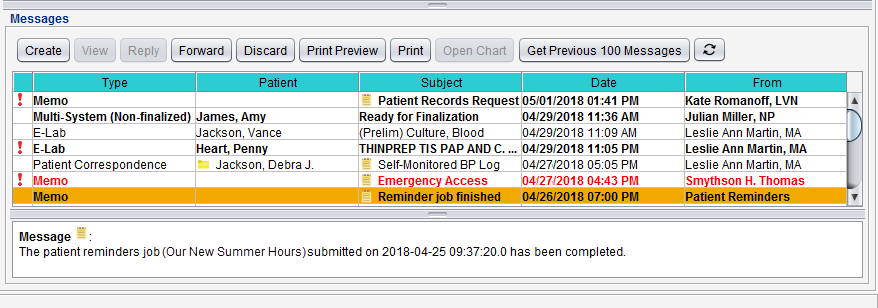
The Messages inbox displays the message Type, Patient name, message Subject, the Date and time the message was received, and the name of the sender (From).
To read a message in the inbox, select the message and click View or double-click the message
Messages that have not been viewed display in bold face text
A red exclamation point displays next to messages with a priority of Urgent
Messages with a priority of Critical display in red text
A notepad icon () displays next to the Subject line of messages that include a text note
Click Open Chart to open the chart of the patient associated with a message
The Open Chart button is only enabled when a patient is associated with the message
Click Get Previous 100 Messages to view more/older messages
Tip
The Inbox refreshes automatically but can be updated on demand by clicking
An orange envelope icon () will display in the notifications area when a new message is received. Double-clicking on the notification icon will navigate the user to the Task List/Messages tab.
Note
The number that appears on the icon is the number of new or unread messages in the Inbox. If there are no new or unread messages in the Inbox, the icon will not be visible
Sending MessagesCreate a New Message
Go to Desktop > Task List/Messages
Click Create from the Messages inbox
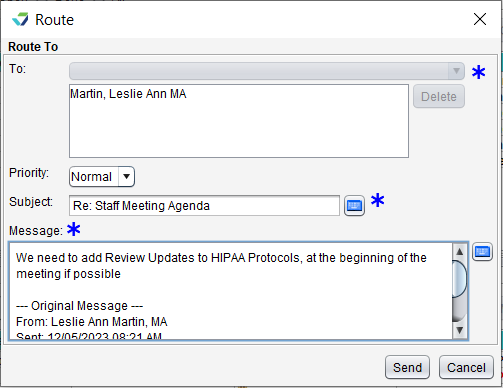
Search for and select a user or group from the To list
Multiple individual users, multiple groups, or a combination of users and groups can be selected
Select a Priority for the message or leave defaulted to Normal
Populate the Subject and Message body fields
Select a message favorite from the Subject selection list or click Custom and type a subject and message
Click Send
Reply to a Message
Only Memo message types can be replied to.
Go to Desktop > Task List/Messages
Select the message from the Messages inbox and click Reply
Optional: update the message recipient (To)
Optional: update the message Priority
Optional: update the message Subject
Type a reply in the Message field
Click Send
Forward a Message
Only Memo message types can be forwarded.
Go to Desktop > Task List/Messages
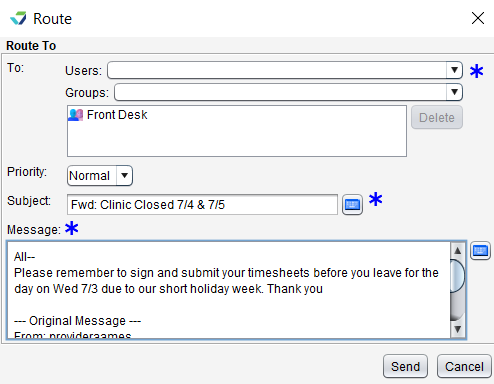
Select the message from the Messages inbox and click Forward
Search for and select a user or group from the To list
Multiple individual users, multiple groups, or a combination of users and groups can be selected
Optional: update the message Priority
Optional: update the message Subject
Type a message in the Message field
Click Send
Deleting Messages
To delete a message, select the message and click Discard. To delete multiple messages, hold down the CTRL key and select individual messages or hold down the SHIFT key to select a range of messages and click Discard.
A message will display to verify the user would like to discard the message before deleting it from the inbox. Click Yes to delete.
Warning
Once deleted, a message cannot be retrieved or restored



 ) will display in the notifications area when a new task is received. Double-clicking on the notification icon will navigate the user to the Task List/Messages tab.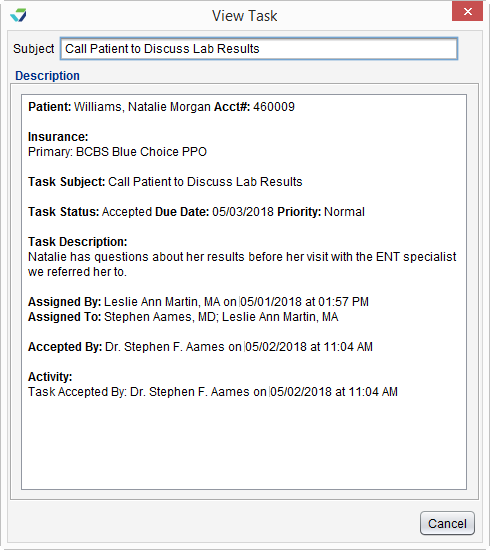
 to move to the Assigned Users column
 to move to the Unassigned Users column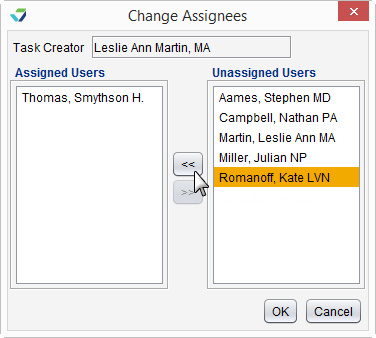


 ) will display in the notifications area when a new message is received. Double-clicking on the notification icon will navigate the user to the Task List/Messages tab.