
The Patient Portal Inbox displays messages received from patients. From the Patient Portal Inbox, users can reply to messages, store message attachments, and create and send new messages.
Configuration
Patient Portal message favorites can be customized by the Clinic Administrator by going to Tools > Preferences > CLINIC > Clinic Wide Form Data > Begin Edit and selecting Messaging from the Tab list
Patient Portal Inbox Display
The inbox displays the name of the patient (From), the message Subject, the Date and time the message was received, and the patient’s Clinic Provider. Messages with attachments are identified by the paper clip icon in the left-most column of the inbox.
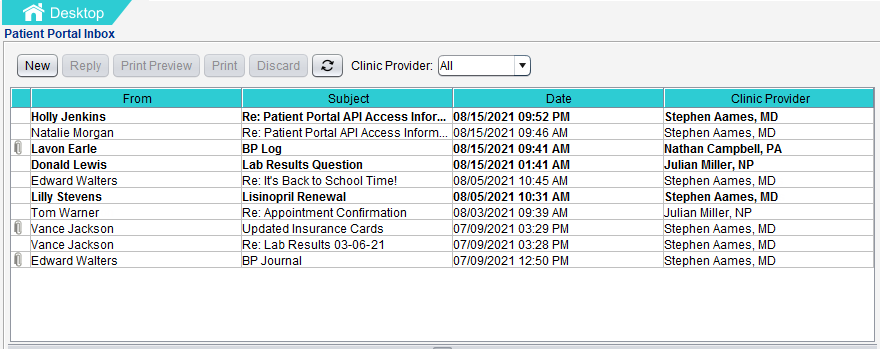
The messages in the inbox can be sorted by column in ascending or descending order by clicking any column header. To filter messages by the patient’s Clinic Provider, select the provider’s name from the list.

Note
The Clinic Provider filter list will only display if one or more of the messages in the inbox are from patients with an assigned clinic provider. Messages from patients without a clinic provider will display as “Unassigned” in the Clinic Provider column.
Tip
The Inbox refreshes automatically but can be updated on demand by clicking 
View Patient Portal Messages
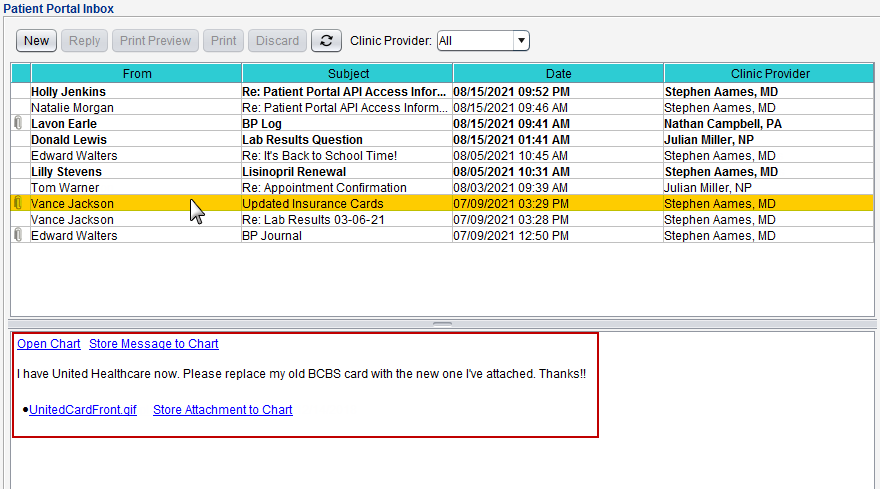
Select a message from the Patient Portal Inbox to view its contents. All messages will display the following commands:
- Open Chart: Click this command to open the patient’s chart
- Store Message: Click this command to store the message to the patient’s chart
- This command can be performed one time only. After the message is stored, the command will be replaced with the text: Stored to Chart on [date stored]
Messages with attachments will display the following commands:
- Attachment name link: Click this link to view the attachment in a new window
- Store Attachment to Chart: Click this command to store the attachment to the patient’s chart
- This command can be performed one time only. After the attachment is stored, the command will be replaced with the text: Stored to Chart on [date stored]
Delete Patient Portal Messages
To delete a message, select the message and click Discard. A message will display to verify the user would like to discard the message before deleting it from the inbox. Click Yes to delete.
Warning
Once deleted, a patient portal message cannot be retrieved or restored
Sending Patient Portal Messages
Create a New Portal Message
- Click New from the Patient Portal Inbox
- Enter patient search criteria and click Search
- Select the patient and click OK
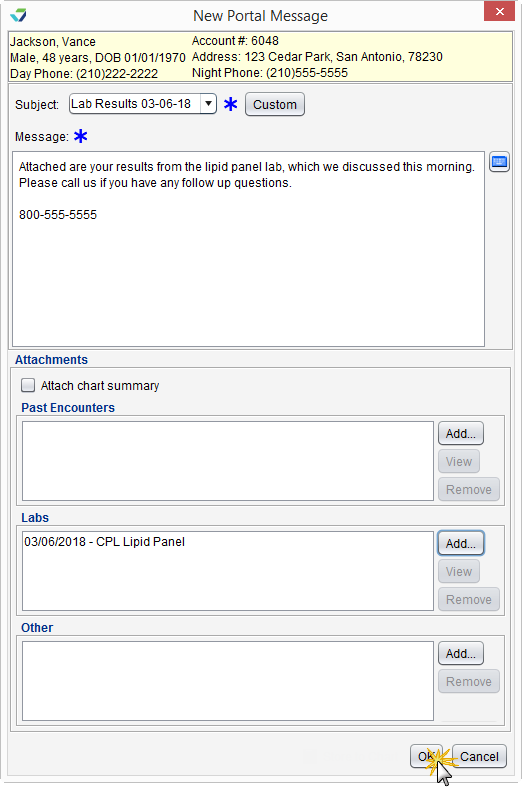
- Populate the Subject and message body fields
- Select a message favorite from the Subject selection list or click Custom and type a subject and message
- Optional: add any of the following attachments to the message:
- Select the Attach chart summary checkbox to include the patient’s chart summary
- Click Add in the Past Encounters section to attach one or more past encounters
- Click Add in the Labs section to attach one or more lab results
- Click Add in the Other section to add one or more PDF attachments
- Click OK to send
Reply to a Portal Message
- Select the message from the Patient Portal Inbox and click Reply
- Populate the message body
- Optional: add any of the following attachments to the message:
- Select the Attach chart summary checkbox to include the patient’s chart summary
- Click Add in the Past Encounters section to attach one or more past encounters
- Click Add in the Labs section to attach one or more lab results
- Click Add in the Other section to add one or more PDF attachments
- Click OK to send
Tasks Associated with Sending Portal Messages
View a Message Attachment
To view an attached Past Encounter or e-Lab while composing a portal message, select the attachment and click View
Remove a Message Attachment
To remove a Past Encounter, Lab, or Other attachment type before sending a portal message, select the attachment and click Remove
View Sent Messages
Portal messages sent to a patient can be viewed in the Past Encounters tab in the patient chart. Select the Portal Message encounter category from the filter list to view only portal messages.
Other Ways to Send Patient Portal Messages
Messages can be sent using the patient portal from the following areas:
- Chart Tools menu: Send Portal Message
- Patient Encounter: upon encounter Finalization
- Patient Reminders tab
Storing Items from the Patient Portal Inbox
Portal messages from patients and any message attachments can be saved to the patient’s chart.
Store a Patient Portal Message
- Select the message from the Patient Portal Inbox and click Store Message to Chart from the message body
- Click Yes to store the message
The stored message can be viewed in the Past Encounters tab of the patient chart.
Store a Patient Portal Message Attachment
- Select the message from the Patient Portal Inbox and click Store Attachment to Chart from the message body
- Populate the following required fields: Type, Clinical Date, and Summary
- Provider is optional
- Click Store to Chart

The stored attachment can be viewed in the Imported Documents tab of the patient chart.