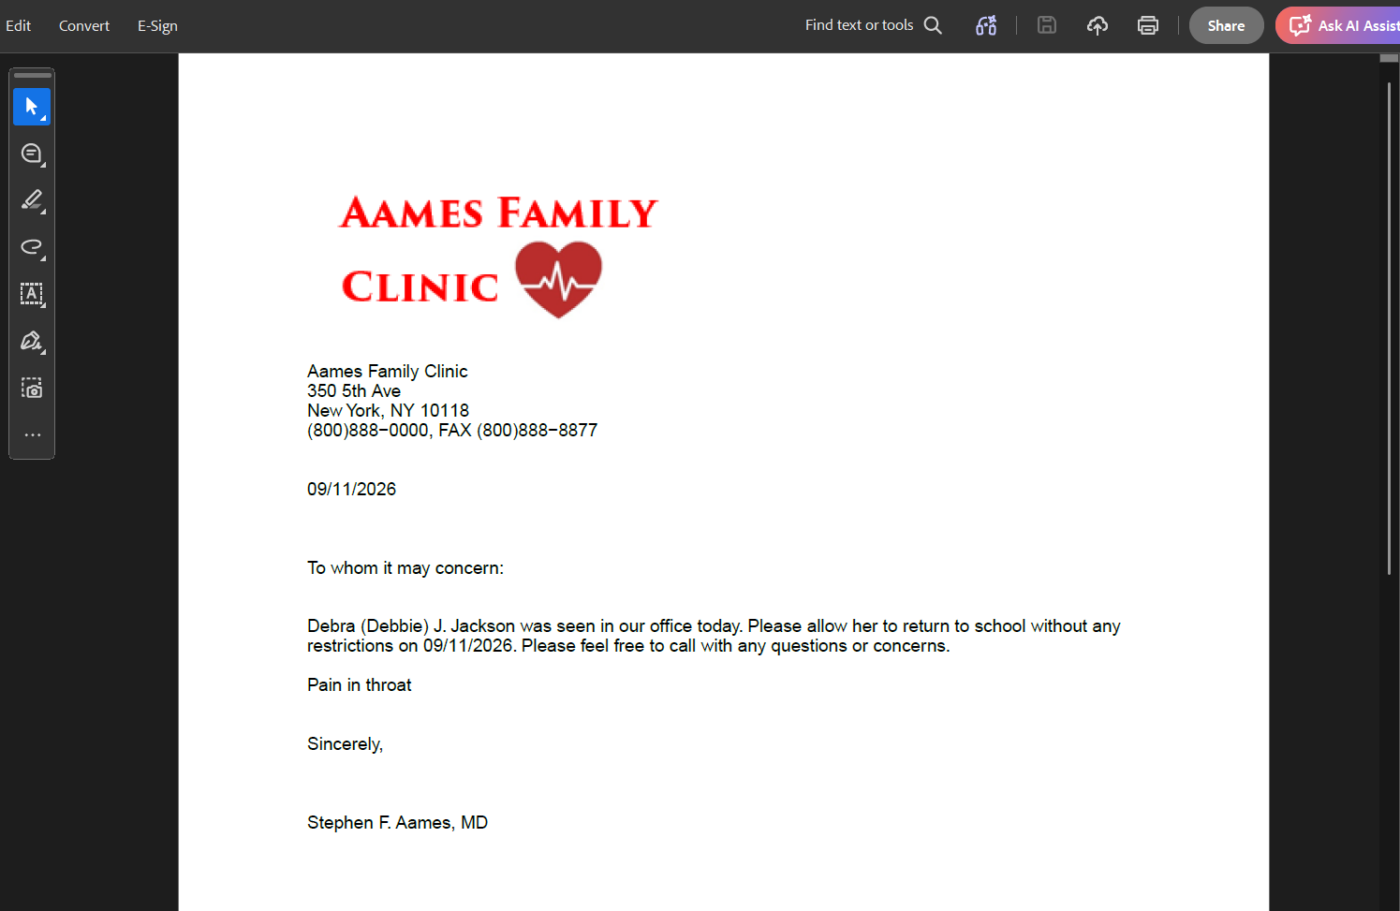
The Letter tool is used to create and store patient letters.
Configuration
- Letter Templates are customizable at the user or CLINIC user level. Go to Tools > Preferences > CLINIC or [user] > Letter Templates > Begin Edit
- Message routing Groups are customizable at the user and CLINIC level. Go to Tools > Preferences > CLINIC or [user] > Application Settings > Message/Task Groups
- The message Subject selection list can be customized by the Clinic Administrator by going to Tools > Preferences > CLINIC > Clinic Wide Form Data > Begin Edit and selecting Messaging from the Tab list
Creating Letters
The Letter tool enables a user to create patient letters using a combination of stored data fields from the patient chart and free text.
Insert Fields
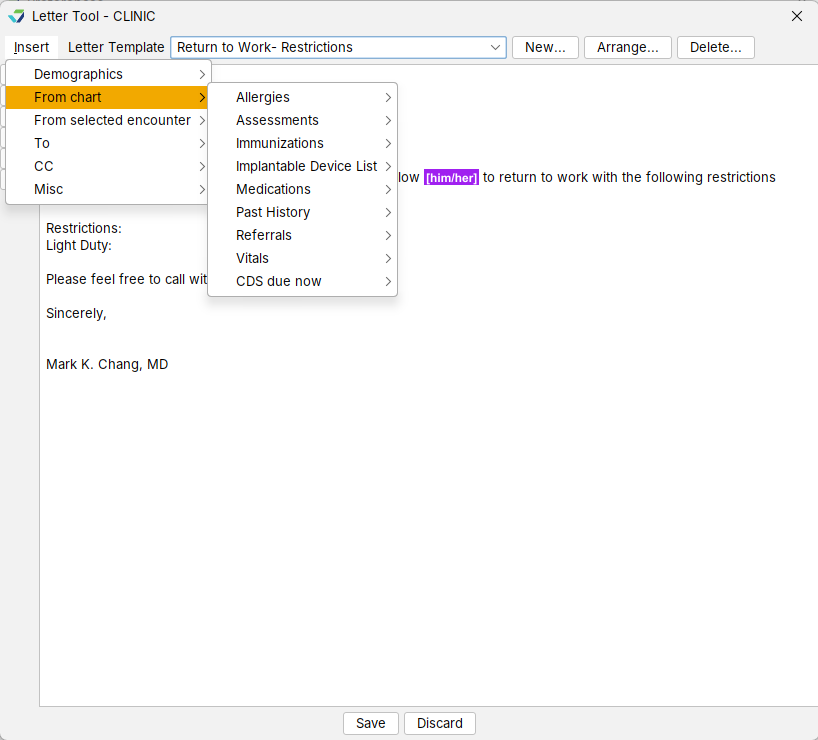
The Insert fields are stored data elements from a patient’s chart that are used to automatically populate sections of a letter. Insert fields are divided into six categories:
- Demographics: data elements from the Patient Information and Insurance demographic subtabs
- From Chart: data elements from clinical information stored at the chart level
- From Selected Encounter: data elements from a selected Past Encounter
- To: data elements from a patient’s Professional Contacts list
- CC: data elements from a patient’s Professional Contacts list
- Misc: general data elements such as Date, Clinic Demographics, and patient pronouns
Create a New Letter
- Go to Chart > Chart Tools > Letter
- Type the patient letter in the free text field
- Optional: use the formatting tools to apply a style (Bold, Italic, or Underline) or color (Red, Blue, or Black) to the letter text
- Optional: Click Insert to select and insert any relevant data elements into the letter text
- Click Process
Some Insert fields require user input in order to generate the letter
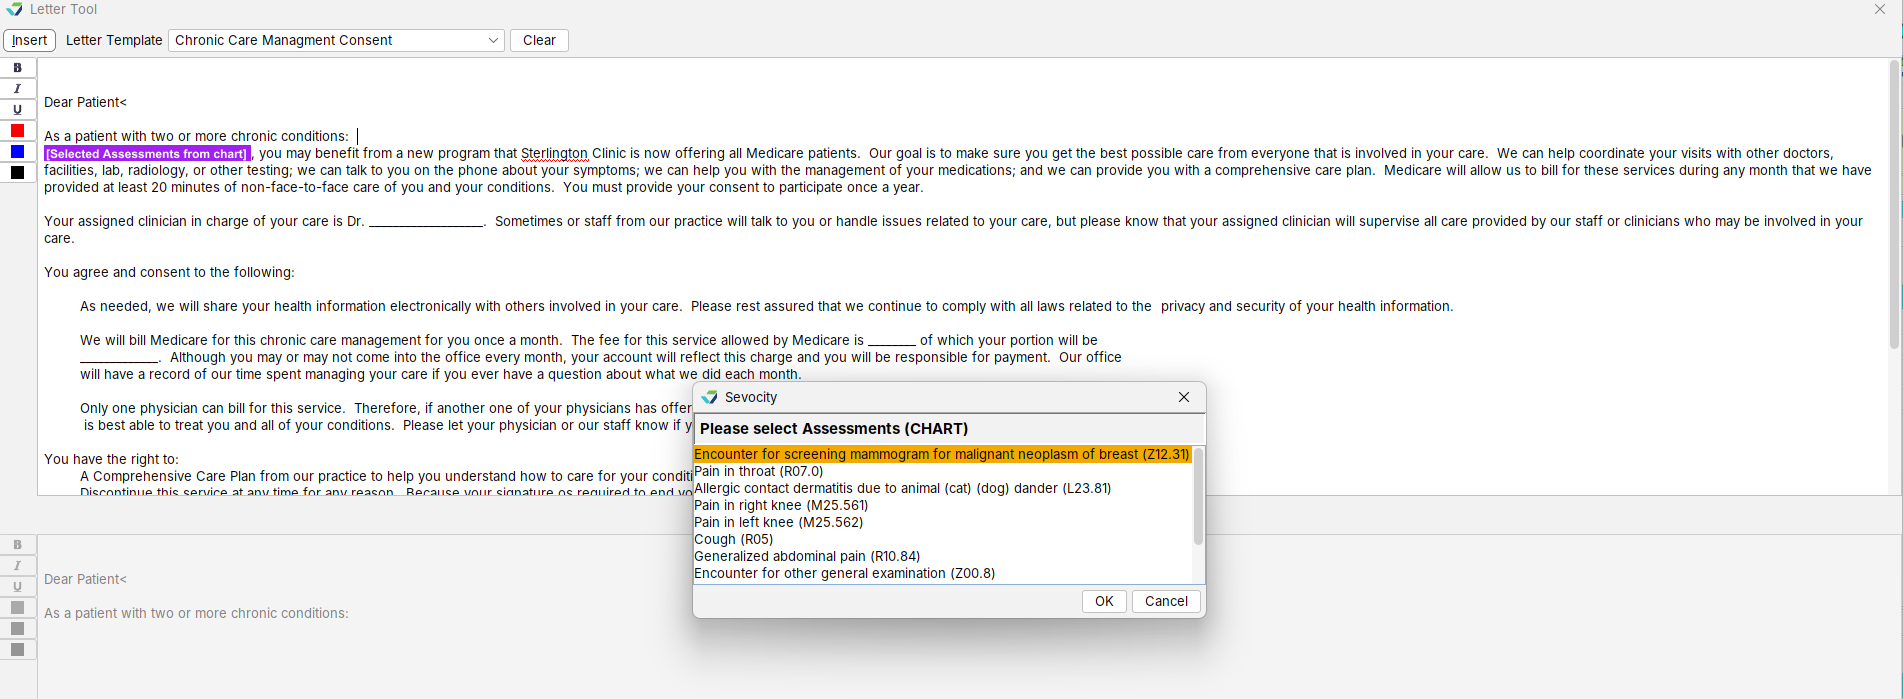
The final letter is generated and displayed in the lower field of the Letter Tool
- Optional: edit or update the letter text if needed or use the formatting tools to apply a style (Bold, Italic, or Underline) or color (Red, Blue, or Black) to the letter text
- Optional: Click Print Preview or Print to print the letter
- Click Save to Chart/Route
- Type a name or description for the letter and click OK
- Click OK to acknowledge the letter has been stored to the chart
Create a Letter From a Template
- Go to Chart > Chart Tools > Letter
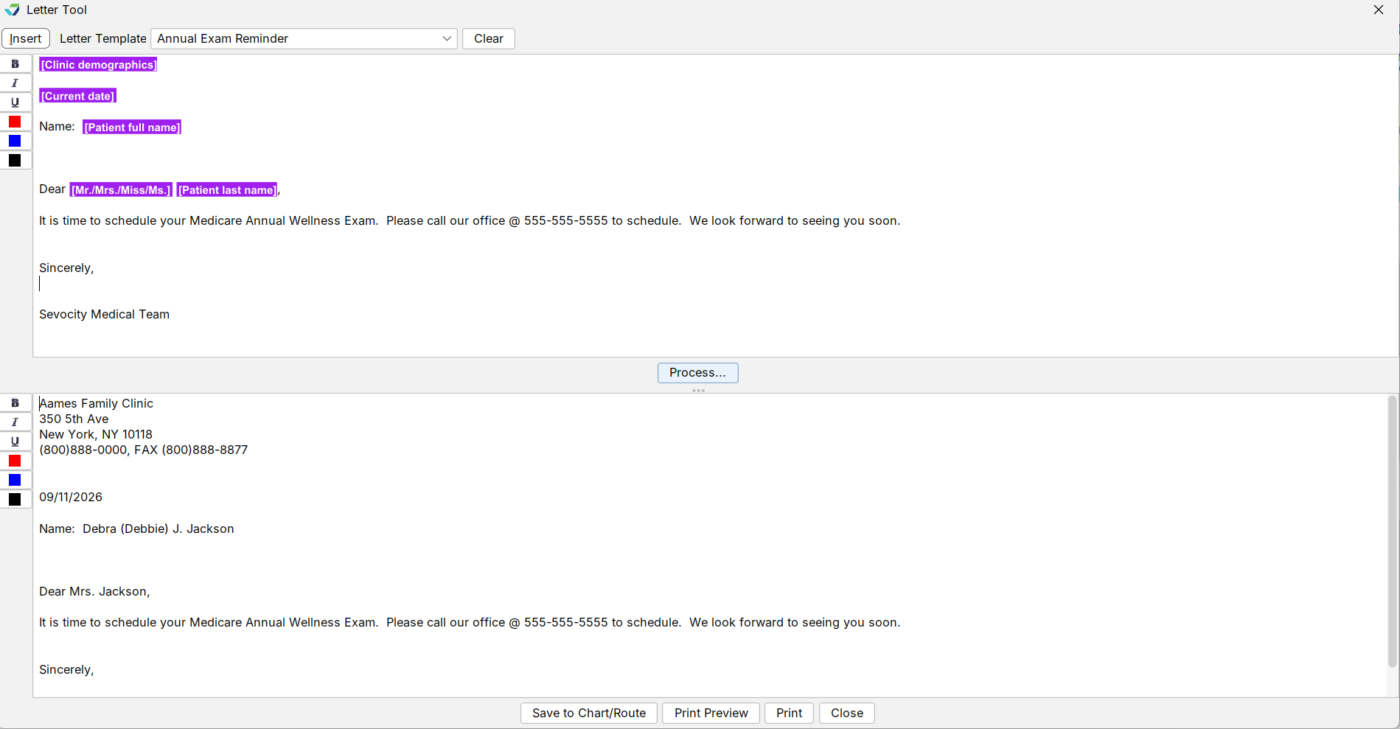
- Select a letter from the Letter Template list
Optional: edit or update the letter text if needed or use the formatting tools to apply a style (Bold, Italic, or Underline) or color (Red, Blue, or Black) to the letter text
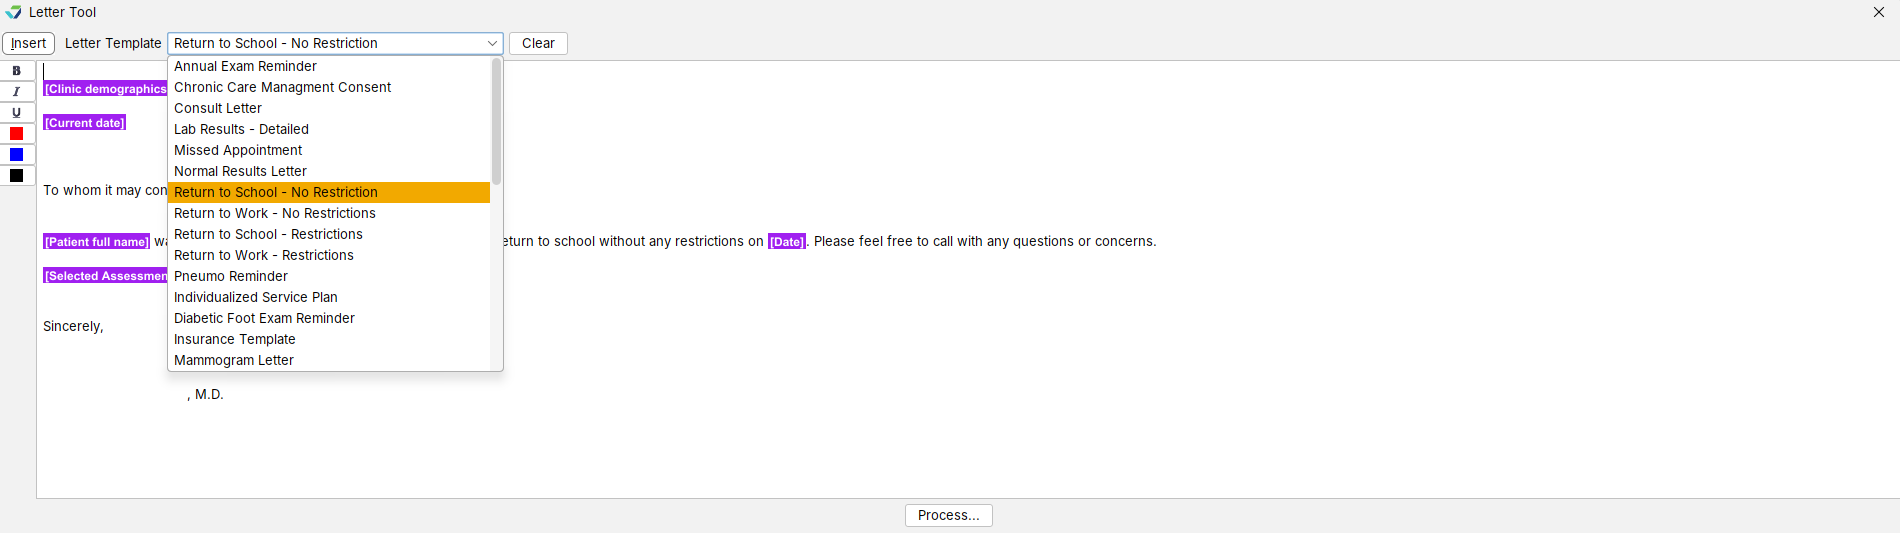
Click Process
Some Insert fields require user input in order to generate the letter
The final letter is generated and displayed in the lower field of the Letter Tool
- Optional: edit or update the letter text if needed or use the formatting tools to apply a style (Bold, Italic, or Underline) or color (Red, Blue, or Black) to the letter text
- Optional: Click Print Preview or Print to print the letter
- Click Save to Chart/Route
- Click OK then click OK to acknowledge the letter has been stored to the chart
Warning
Selecting Print or Print Preview does not save a letter to the patient’s chart
Route a Letter
Letters can be sent to other users in the clinic for review or to perform actions related to the letter. Routed letters are sent to a user’s Messages inbox.
- Go to Chart > Chart Tools > Letter
- Create a letter
- Click Save to Chart/Route
- Optional: type a name or description for the letter
- Select the Route checkbox and click OK
- Select a user or group from the To list
- Multiple individual users, multiple groups, or a combination of users and groups can be selected
- Select a Priority for the message or leave defaulted to Normal
- Select an item from the Subject selection list or click Custom and type a subject
- Click OK
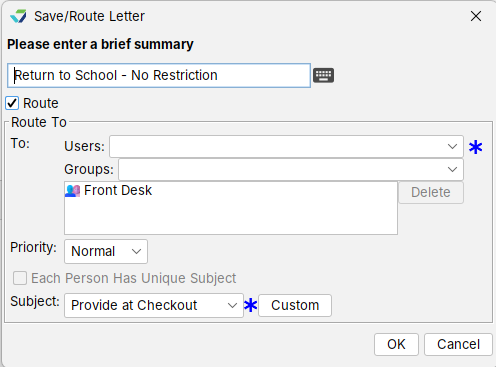
Routed letters are automatically stored to the patient chart.
View a Stored Letter
Saved letters are stored to the patient chart in the Past Encounters tab.
- Go to Chart > Past Encounters
- Select a patient letter
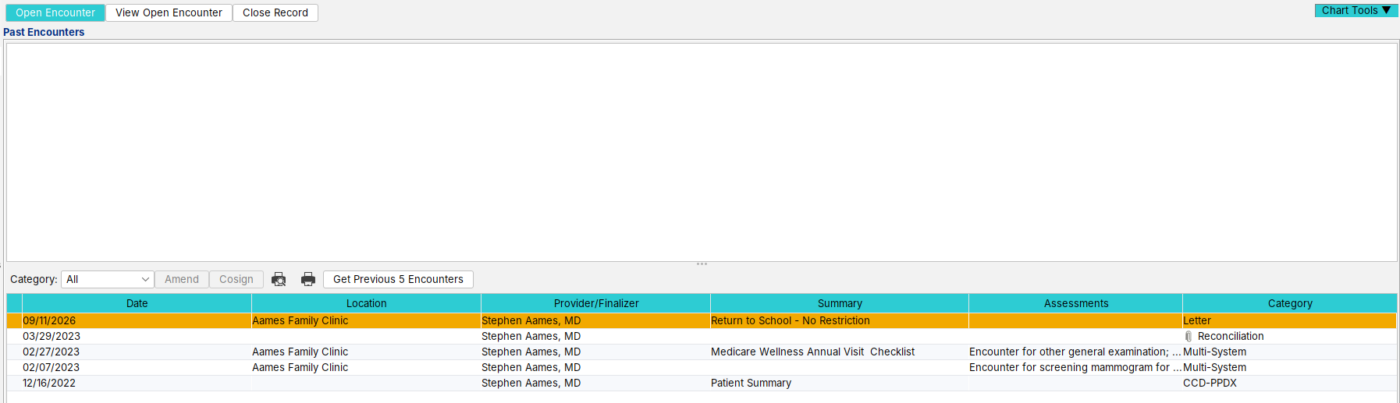
The letter is displayed as a PDF