Direct Message Inbox
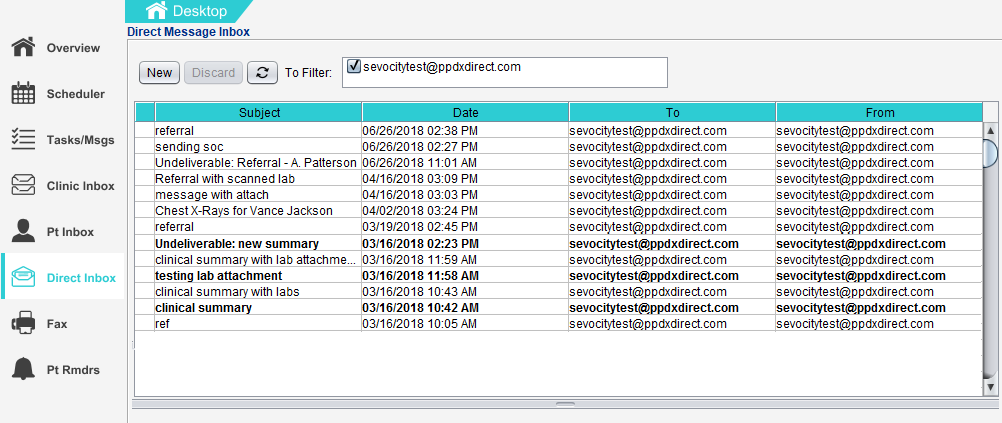
The Direct Message Inbox displays messages received from other providers and healthcare organizations. From the Direct Message Inbox, users can reply to messages, store message attachments, and create and send new messages.
Direct Message favorites can be customized by the Clinic Administrator by going to Tools > Preferences > CLINIC > Clinic Wide Form Data > Begin Edit and selecting Messaging from the Tab list
The Direct Message Inbox displays the message Subject, the Date and time the message was received, the secure email of the recipient (To), and the secure email of the sender (From).
Users with access to multiple Direct Message accounts can filter the messages that display in the Direct Message Inbox by selecting or clearing the checkbox next to each account name in the To Filter section.

Clearing the checkbox will only remove the messages from current the inbox view. This action will not delete nor permanently remove any messages from the inbox.
The Inbox refreshes automatically but can be updated on demand by clicking 
To delete a message, select the message and click Discard. A message will display to verify the user would like to discard the message before deleting it from the inbox. Click Yes to delete.
Once deleted, a Direct Message cannot be retrieved or restored
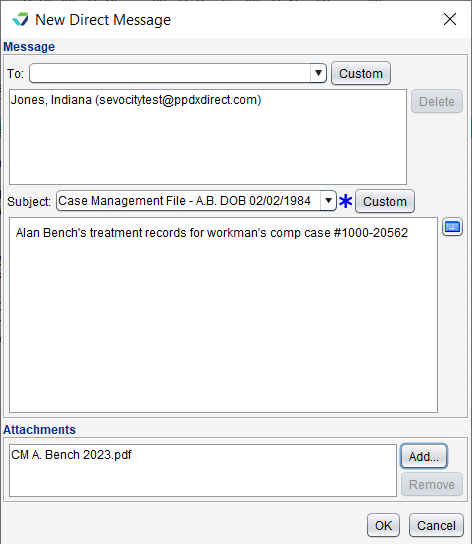
Messages can be created and sent directly from the Direct Message Inbox.
- Click New from the Direct Message Inbox
- Populate the To field with one or more recipients by selecting a secure contact from the To selection list or by clicking Custom to add a new recipient
- Last Name, First Name, and Secure Email address are required to add a Custom recipient
- Optional: click Search in Directory to search for and add a Custom recipient using a Direct exchange email address directory
- Populate the Subject and message body fields
- Select a message favorite from the Subject selection list or click Custom and type a subject and message
- Optional: click Add in the Attachments section to select files to include with the message
- Multiple file attachments are allowed
- Maximum size per file is 4MB
- Click OK to send
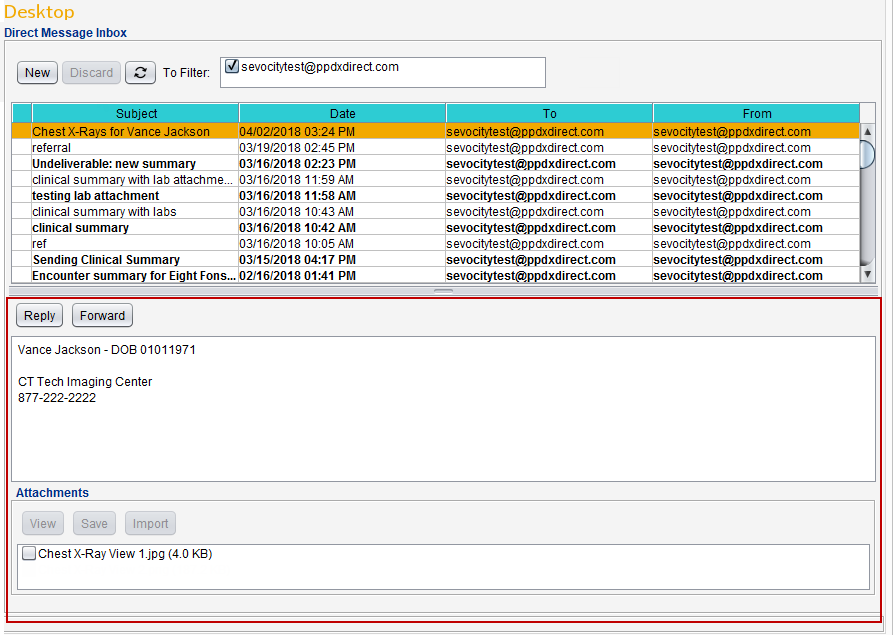
- Select the message from the Direct Message Inbox and click Reply
- Populate the message body
- Optional: Click Add in the Attachments section to select files to include with the message
- Multiple file attachments are allowed
- Maximum size per file is 4MB
- Click OK to send
- Select the message from the Direct Message Inbox and click Forward
- Populate the To field with one or more recipients by selecting a secure contact from the To selection list or by clicking Custom to add a new recipient
- Last Name, First Name, and Secure Email address are required to add a Custom recipient
- Optional: click Search in Directory to search for and add a Custom recipient using a Direct exchange email address directory
- Populate the message body
- Optional: Click Add in the Attachments section to select files to include with the message
- Multiple file attachments are allowed
- Maximum size per file is 4MB
- Click OK to send
Only providers or practices with a secure email address in their contact profile will display in the To selection list. See Contact List: About Secure Email Addresses
Messages that are not successfully transmitted to the intended recipient will generate an Undeliverable message in the Direct Message Inbox
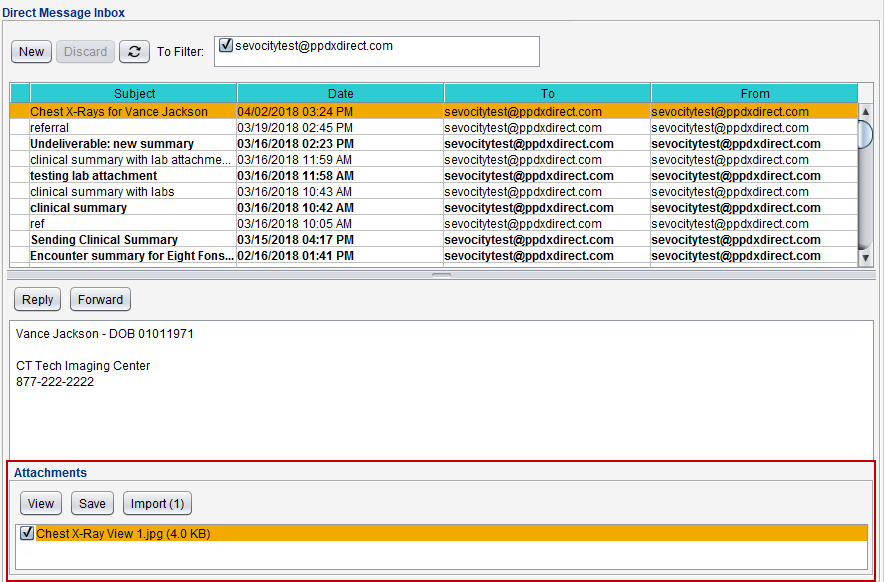
Attachments included in Direct Message communications can be viewed and saved or incorporated as structured data into a patient’s chart. Attached files will display in the Attachments section of the message view.
C-CDA![]() Consolidated Clinical Document Architecture, a document format that enables a patient’s clinical data to be transmitted from one Health IT system to another files received as attachments can be reconciled and incorporated into a patient’s chart. C‑CDA attachments can also be stored as imported documents.
Consolidated Clinical Document Architecture, a document format that enables a patient’s clinical data to be transmitted from one Health IT system to another files received as attachments can be reconciled and incorporated into a patient’s chart. C‑CDA attachments can also be stored as imported documents.
- Select a message with a C‑CDA file attachment from the Direct Message Inbox
- From the Attachments section, select the checkbox next to the C‑CDA file to be reconciled
- Click Import
-
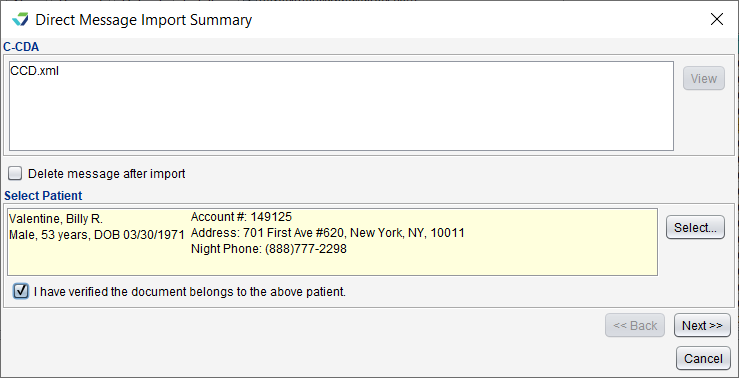
Click Select to search for and select a patient and select the I have verified the document belongs to the above patient checkbox
- Click Next
-
Click Reconcile
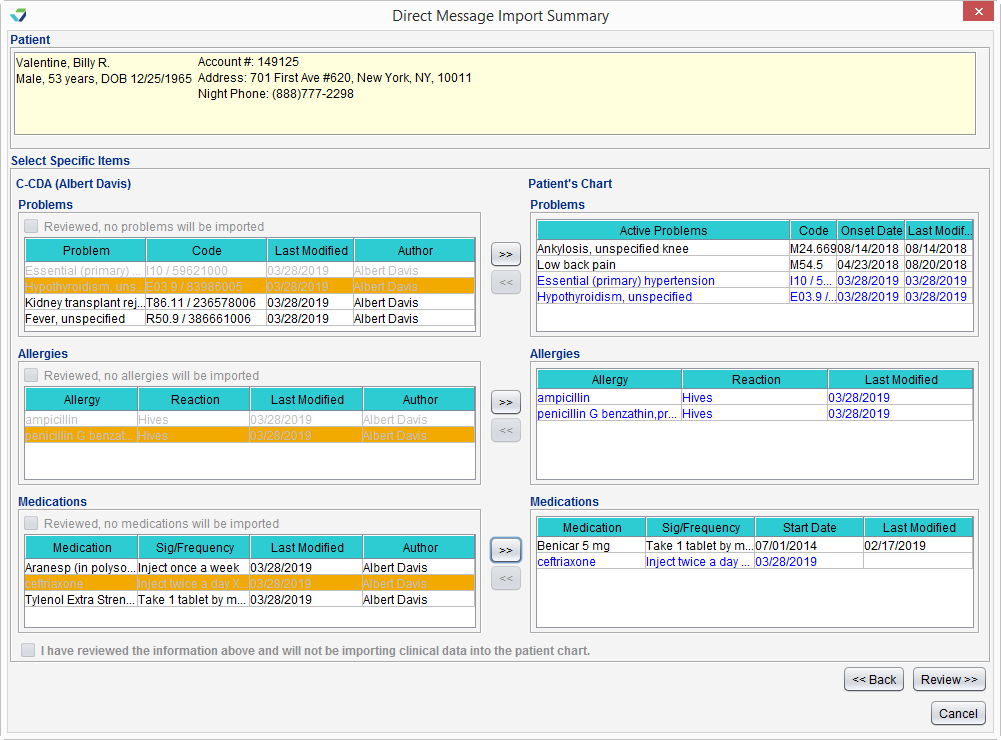
The Problems, Allergies, and Medications from the C‑CDA file display on the left and the problems, allergies, and medications in the Patient's Chart display on the right
- Select an item from the C‑CDA Problems, Allergies, or Medications list and click
 to move the item to the Patient's Chart list
- The added item will display in blue text
- Repeat the process to add more items to the patient chart
- At least one problem, allergy, or medication must be added to the patient chart to complete the reconciliation
- To remove an item added from the C‑CDA file to the patient chart, select the item in the Patient's Chart list and click

-
Click Review
- Review the incorporated data for accuracy and click Sign to complete the reconciliation or click Start Reconciliation Encounter to document additional information in a Reconciliation encounter type
Any problems, allergies, and medications selected for reconciliation are incorporated into the patient's chart.
If there is not a clinically appropriate problem, allergy, or medication to add to the chart, the "Reviewed, no [problems/allergies/medications] will be imported" checkbox can be selected for that section of the C‑CDA
If a user attempts to add a problem/allergy/medication to a patient chart when the patient has a documented entry of No Known problems/allergies/medications, a message will display alerting the user that adding the problem, allergy, or medication will inactivate the current patient chart entry. The user will need to click Yes to confirm the data overwrite or click No to cancel the action.
If a user attempts to add an entry of No Known problems/allergies/medications to a patient chart with a documented problem/allergy/medication, a message will display alerting the user to the contradictory entry and will prevent the user from adding the data to the chart.
The C‑CDA file and reconciliation activity are stored as a Reconciliation encounter type and can be viewed in the Past Encounters tab of the patient chart.
- Select a message with a C-CDA file attachment from the Direct Message Inbox
- From the Attachments section, select the checkbox next to the C-CDA file to be reconciled
- Click Import
-
Click Select to search for and select a patient and select the I have verified the document belongs to the above patient checkbox
- Click Next
-
Click Reconcile
-
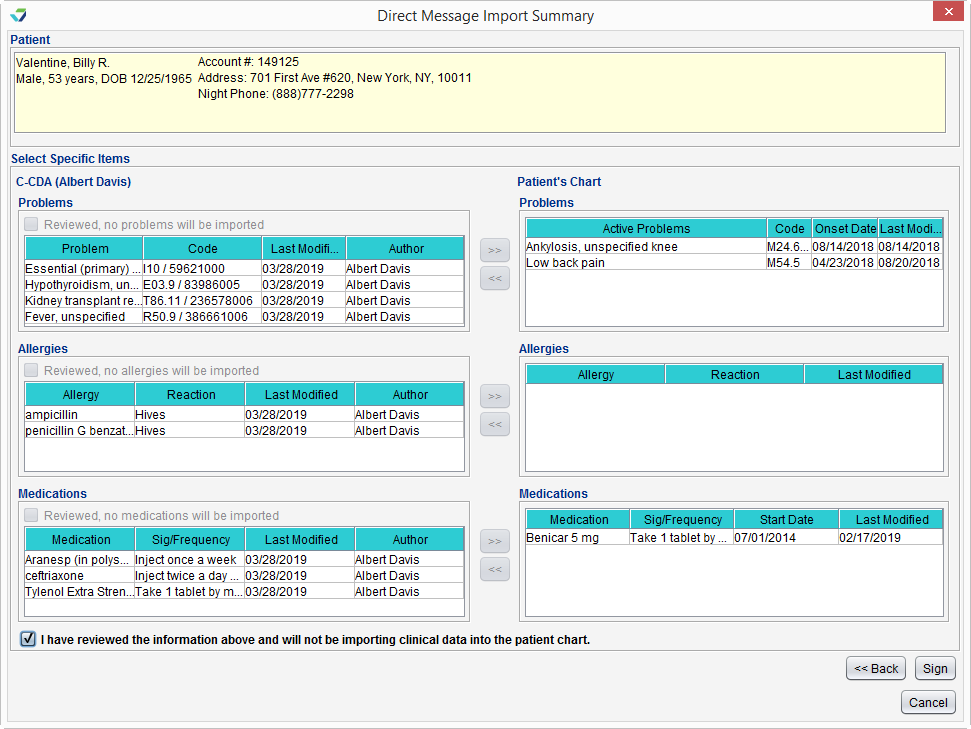
After reviewing the patient's Problems, Allergies, and Medications, select the I have reviewed the information above and will not be importing clinical data into the patient chart checkbox
- Click Sign to complete the reconciliation
The C‑CDA file and reconciliation activity are stored as a Reconciliation encounter type and can be viewed in the Past Encounters tab of the patient chart.
- Select a message with a C-CDA file attachment from the Direct Message Inbox
- From the Attachments section, select the checkbox next to the C-CDA file to be stored
- Click Import
- Click Select to search for and select a patient and select the I have verified the document belongs to the above patient checkbox
- Click Next
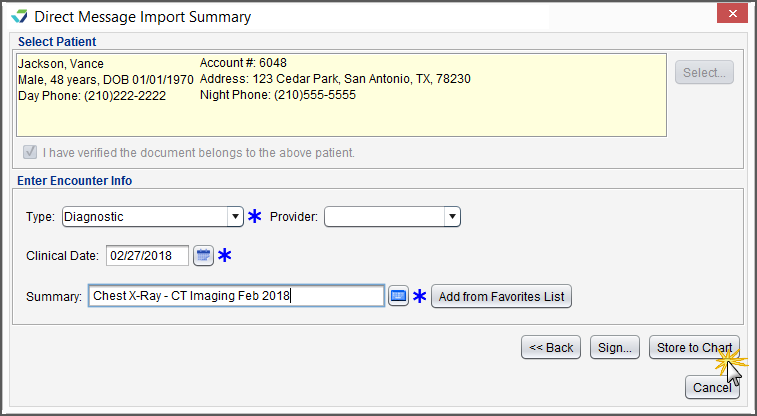
- Click Attach
- Enter the following required information: Type, Clinical Date, and Summary
- Provider is optional
- Click Sign or Store to Chart
The stored attachment can be viewed from the Imported Documents tab of the patient chart.
All other file types received as attachments can be stored as imported documents.
- Select a message with an attachment from the Direct Message Inbox
- From the Attachments section, select the checkbox next to the file to import
- Click Import
- Click Select to search for and select a patient and select the I have verified the document belongs to the above patient checkbox
- Click Next
- Enter the following required information: Type, Clinical Date, and Summary
- Provider is optional
- Click Sign or Store to Chart
The stored attachment can be viewed from the Imported Documents tab of the patient chart.
The Save button in the Attachments section saves the attached file outside of Sevocity to a destination selected by the user, such as a network drive or local computer.
Didn't find the answer you were looking for?
Contact Sevocity Support 24/7 at 877‑777‑2298 or support@sevocity.com
