Vitals
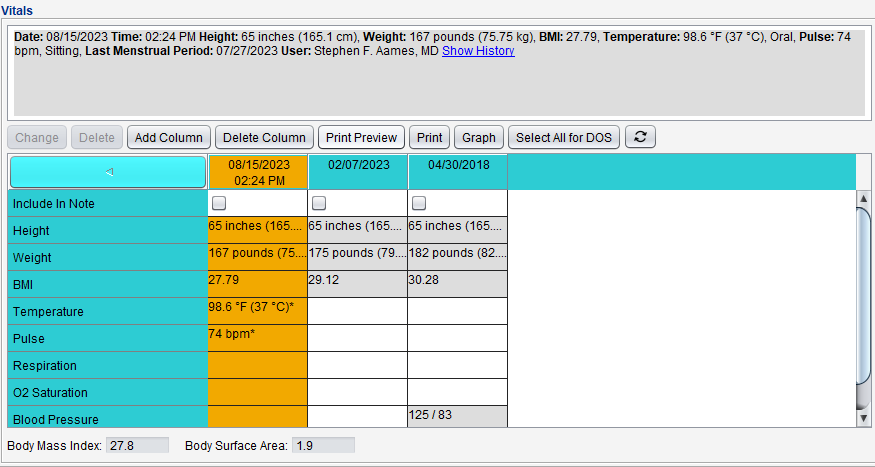
The Vitals tab captures vital signs documented in the current encounter and displays vitals recorded during a patient's previous encounters.
Vitals is available in the following encounter types: Exam, Historical, Immunization, Multi-System, Procedure, Telephone, Reconciliation, and Urgent Care.
- The vitals sort order, encounter note display format, Time default, and default graph time frame can be set by the Clinic Administrator in Vitals General
- The vital sign fields available for documentation and vital sign units of measurement can be configured by the Clinic Administrator in Vitals Configuration
- The high and low range for vital sign readings can be defined by the Clinic Administrator by going to Tools > Preferences > CLINIC > Vitals > Parameters
- Selection list items for blood pressure reading Location, last menstrual period Status, O2 saturation Source, and peak flow Status can be customized. Clinic Administrators can edit the list items by going to Tools > Preferences > CLINIC > Clinic Wide Form Data > Begin Edit and selecting Vitals from the Tab list
- Clinic Administrators can enable Vitals Alerts in Clinic Settings: Alerts/Reminders/CDS
-
Select any column header to display all vitals data for that entry
-
To sort the vitals data columns from oldest to newest or from newest to oldest, click the sort button

-
Select the Include in Note checkbox to add the vitals data to the encounter Note Display
-
Click Select All for DOS to select the Include in Note checkbox for all vitals entry columns with the same date of service as the encounter
-
Click
 to update the vitals data column with entries added after the encounter was opened
- Go to Encounter > Vitals
- Click Add Column
- Optional: update the Time field, if needed
- Document vital signs in the appropriate fields
- If the patient's height was previously documented, clicking Last will populate the Height field with the last recorded value
- If the patient's height and weight are documented, the patient's Body Mass Index (BMI) and Body Surface Area are automatically calculated upon saving vitals
- If the date or status of the patient's last menstrual period were previously documented, clicking Last will populate the Last Menstrual Period and Status fields with the last recorded values
- Click Save
Vital sign data can be changed prior to finalizing the encounter.
- Select the vital sign component to edit and click Change
- Edit the appropriate field(s)
- Click Save
Individual vital sign entries can be deleted prior to finalizing the encounter.
- Select the vital sign component
- Click Delete
- Click Yes to confirm decision to delete
The entire vitals entry column can be deleted prior to finalizing the encounter.
- Select the vitals column to delete
- Click Delete Column
- Click Yes to confirm decision to delete
All data in the vitals entry will be deleted and cannot be restored
Clinic Administrators can enable vital sign alerts to create an alert when a patient's vital signs are outside of the clinic-defined normal parameters. These alerts will display upon saving vitals or when opening an encounter if any of the patient's vital signs are outside of the normal parameters.
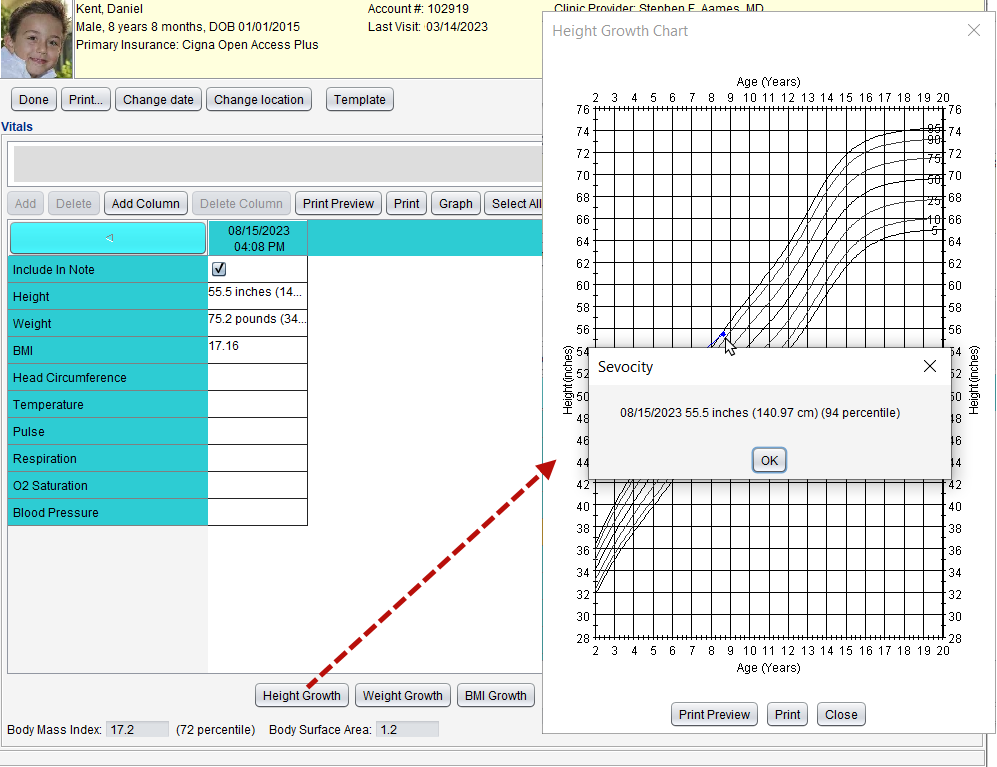
The following growth charts based on CDC guidelines can be generated for patients up to 20 years of age:
- Patients 0–36 months: Length/Height, Weight, Weight for Length, Head Circumference, and BMI
- Patients 3 years up to 20 years: Height, Weight, and BMI
Click a growth chart button to generate the chart. Selecting a plot point on the graph displays the values entered and the calculated percentile.
Didn't find the answer you were looking for?
Contact Sevocity Support 24/7 at 877‑777‑2298 or support@sevocity.com


