Fax Inbox
The Fax inbox displays faxes received through a secure, electronic interface with Sfax. From the Fax inbox, users can view, store, and route incoming faxes and create and send new faxes.
The Fax inbox is only available for customers with an active Sfax account. Customers interested in signing up for an Sfax account or in setting up an Sfax inbox integration should contact Sevocity Support to begin the setup process. Fees vary per account
A user must have Can access Fax Inbox selected in their user profile to access the Fax inbox.
- Selection items for the Add Note Add From Favorites list and the Route Message Add From Favorites list are customizable at the user and CLINIC level. Go to Tools > Preferences > CLINIC or [user] > Form Data > Begin Edit and select Image/File Import from the Tab list
- Selection list items for the Add from Favorites List for the Summary field can be customized by the Clinic Administrator by going to Tools > Preferences > CLINIC > Clinic Wide Form Data > Begin Edit and selecting Image Import from the Tab list
The Fax inbox displays the Date and time the fax was received, the number of Pages in the fax, the fax number it was sent To, the Location it was sent to, and the name and fax number of the sender (From). If the sender's fax number is matched to the Fax number of a provider or practice in the Contact List, the sender's name will display. If the sender's fax number does not match a contact, only the number will display.
- The inbox displays faxes received in the Last 7 Days by default
- To change the display date range, select an option from the list of pre-defined date ranges or select Custom, populate the Start and End dates, and click Pull
- Click
 to check for new faxes
- The inbox does not refresh automatically and must be refreshed manually to display new faxes
-
The Location list displays for clinics with multiple Sfax accounts. Select an item from the list to filter faxes by location
- Faxes cannot be deleted from the inbox. Faxes can be deleted by authorized users from the Sfax web application
All faxes in the inbox display in plain text by default. The text style of the fax does not change if the fax has been viewed, routed, or stored.
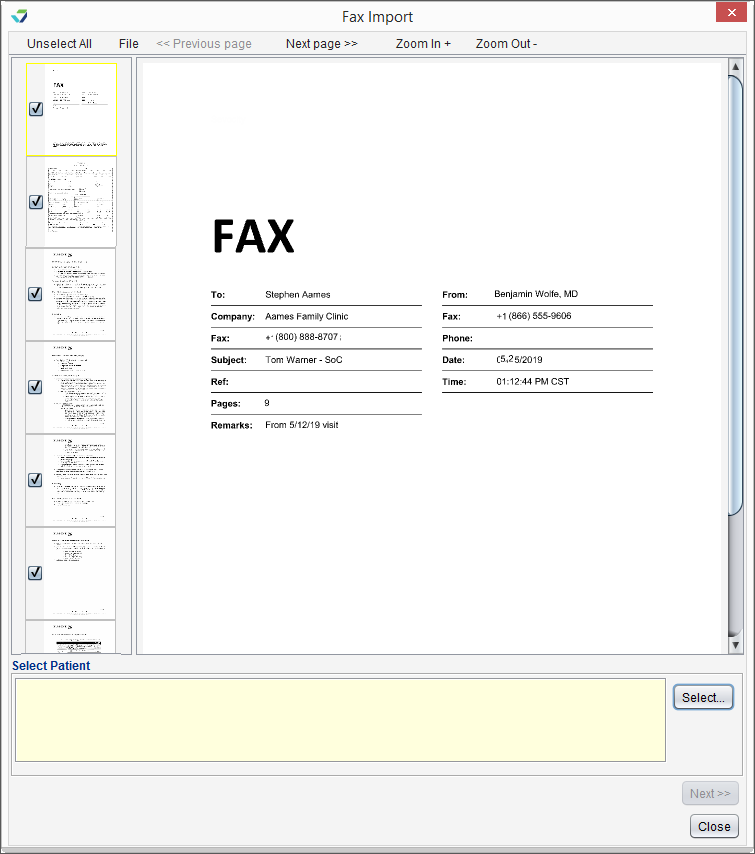
To view a faxed document, select the fax and click View or double-click the fax
- Click Next page >> to navigate to the next page in the fax
- Click << Previous page to navigate to the previous page in the fax
- Click Zoom In + to enlarge the view of the page
- Click Zoom Out - to reduce the view of the page
- Go to File > Print to print the fax
- Go to File > Save to save the file to a local computer or directory
- Go to Desktop > FAX
- Select a fax and click View or double-click to view
- Optional: clear the inclusion checkbox for any pages of the fax that should not be stored to the chart
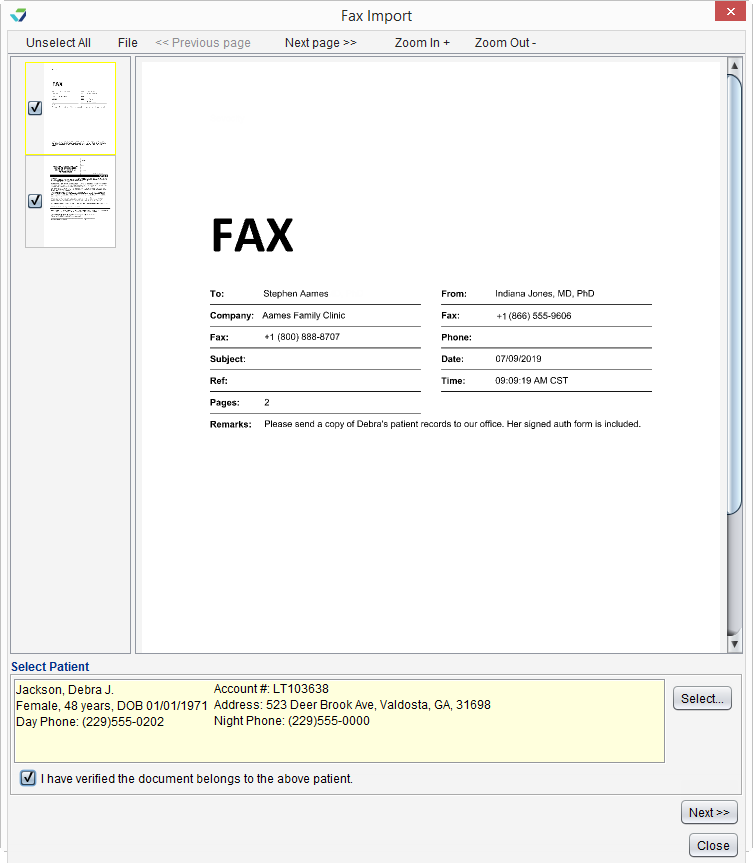
- Click Select to search for and select a patient
-
Select the I have verified the document belongs to the above patient checkbox
-
Click Next
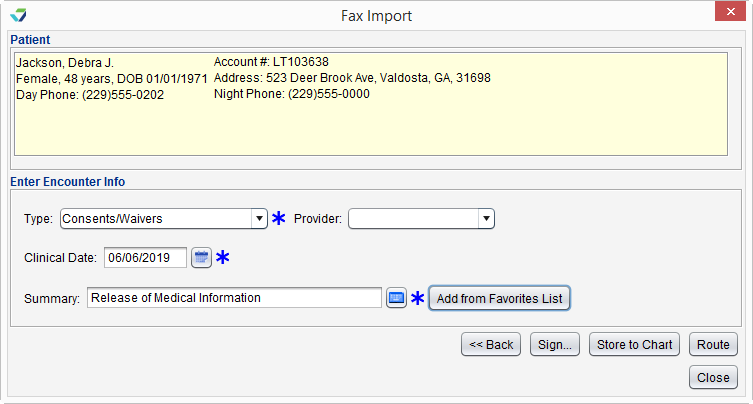
- Populate the following required fields: Type, Clinical Date, and Summary
- Click Store to Chart or Sign
- If signing the document, click OK to sign and save to the patient's chart
- Optional: click Add Note and type a note in the free text field or click Add from Favorites and select one or more items from the list
- Click Close to close the Fax Import window
Faxes are stored to the patient chart in the Imported Documents tab.
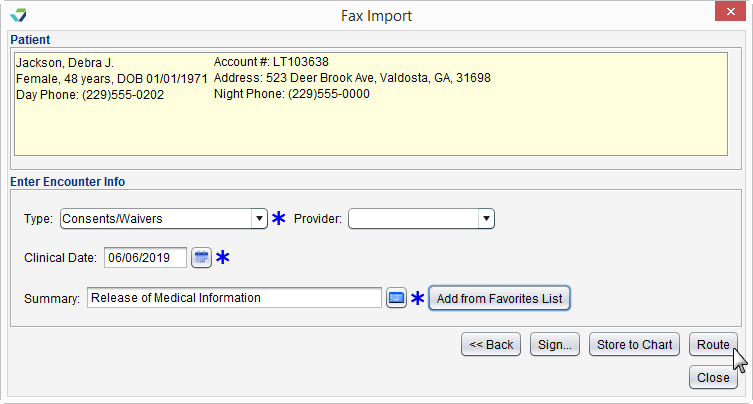
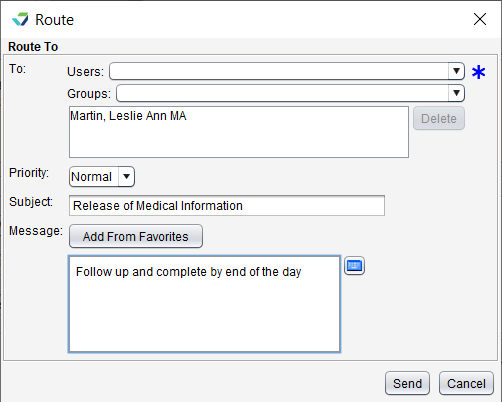
Prior to signing or storing a faxed document to the patient chart, the file can be routed to another user in the clinic for review or to perform tasks related to the document.
-
From the Fax Import window, click Route
- Search for and select a user from the To list
Multiple individual users, multiple groups, or a combination of users and groups can be selected
- Select a Priority for the message or leave defaulted to Normal
-
Type a Message in the free text field or click Add from Favorites and select one or more items from the list
- Click Send
The routed fax will be sent to the assigned user's Messages inbox.
Routing a fax does not sign or save the document
- Go to Desktop > FAX
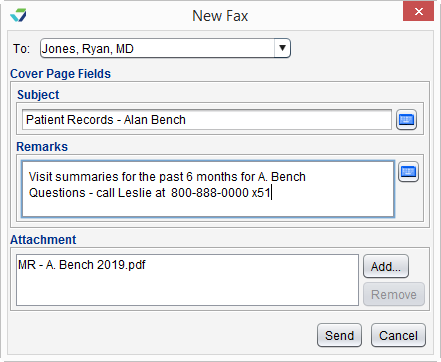
- Click New
- Select a recipient from the To list
- Optional: for clinics with multiple Sfax accounts, select a location from the From list
- Type a subject in the Subject field
- Type a message in the Remarks field
- Click Add to select one or more PDF attachments to include
-
Click Send
Sent faxes can be viewed in the Sfax web application.
Only providers or practices with a fax number in their contact profile will display in the To selection list. See Contact List
Didn't find the answer you were looking for?
Contact Sevocity Support 24/7 at 877‑777‑2298 or support@sevocity.com


