Send Portal Message
The Send Portal Message tool creates and sends messages to patients through the Patient Portal.
Patient Portal message favorites can be customized by the Clinic Administrator by going to Tools > Preferences > CLINIC > Clinic Wide Form Data > Begin Edit and selecting Messaging from the Tab list
- Go to Chart > Chart Tools > Send Portal Message
- Populate the Subject and message body fields
- Select a message favorite from the Subject selection list or click Custom and type a subject and message
- Optional: the following attachments can be included with the message:
- Select the Attach chart summary checkbox to include the patient’s chart summary
- Click Add in the Past Encounters section to add one or more past encounters
- Click Add in the Labs section to add one or more lab results
- Click Add in the Other section to add one or more PDF attachments
- Click OK to send the message
To view an attached Past Encounter or e-Lab while composing a portal message, select the attachment and click View
To remove a Past Encounter, Lab, or Other attachment type before sending a portal message, select the attachment and click Remove
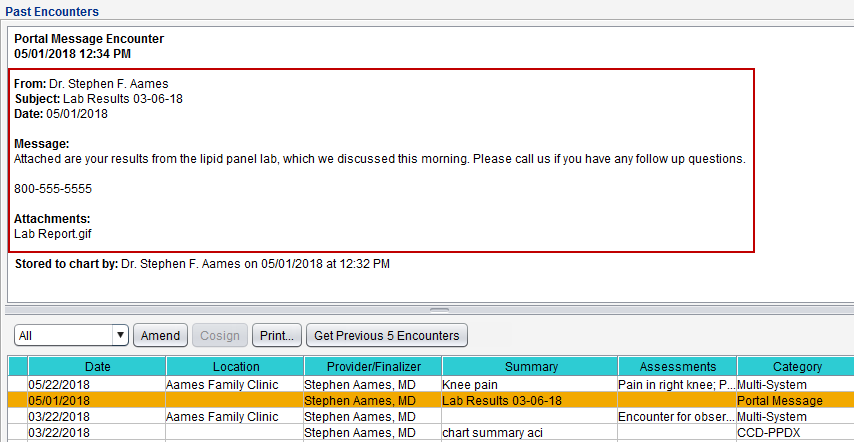
Portal messages sent to a patient can be viewed in the Past Encounters tab in the patient chart. Select the Portal Message encounter category from the filter list to view only portal messages.
If Send Portal Message is not visible in the Chart Tools menu, it is rooted in one of two causes:
- The user does not have the required permission to send messages using the patient portal. See Patient Portal Access
- The patient to whom the user is attempting to send the message does not have a patient portal account. See Enrolling Patients in the Portal
Messages sent to the portal are stored automatically in the patient’s chart and can be viewed in the Past Encounters tab. The message details will display in the encounter view.
Didn't find the answer you were looking for?
Contact Sevocity Support 24/7 at 877‑777‑2298 or support@sevocity.com

