Release Notes August 23, 2018
In This Release...
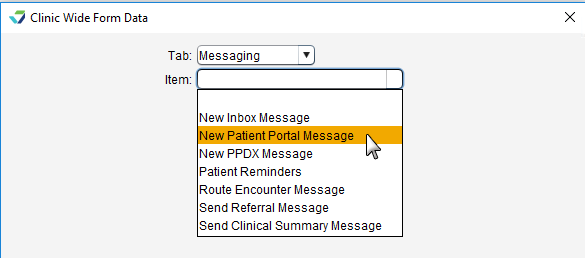
Commonly used messages can be created as message favorites for use in the Patient Portal, PPDX, Patient Reminders, and the Messages inbox. Message favorites can be created for:
- New Inbox messages
- New Patient Portal messages
- New PPDX messages
- Patient Reminder messages (sent through the portal)
- Referral Messages (sent using PPDX)
- Clinical Summary Messages (sent using PPDX)
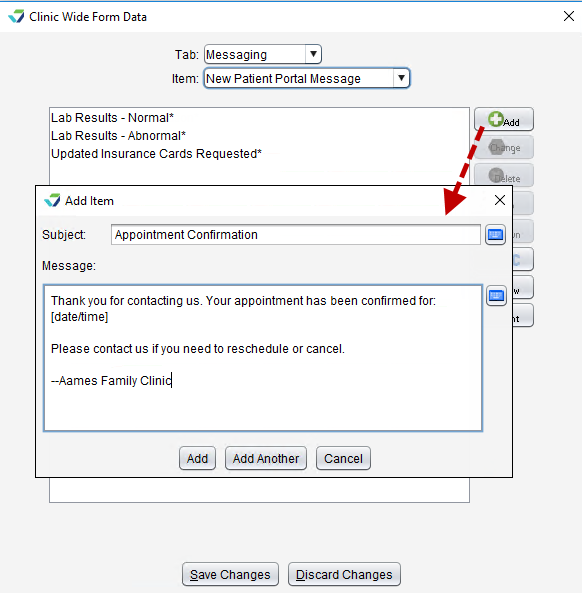
Clinic Administrators are able to create message favorites by going to Tools > Preferences > CLINIC > Clinic Wide Form Data > Begin Edit and selecting Messaging from the Tab list.
The Messaging item previously labeled "Subject" has been relabeled "Route Encounter Message". Any Subject favorites previously created will not be impacted and will remain available for use.
Message favorites are comprised of a Subject line and Message body. Only a Subject is required to save a favorite; the Message body is optional.
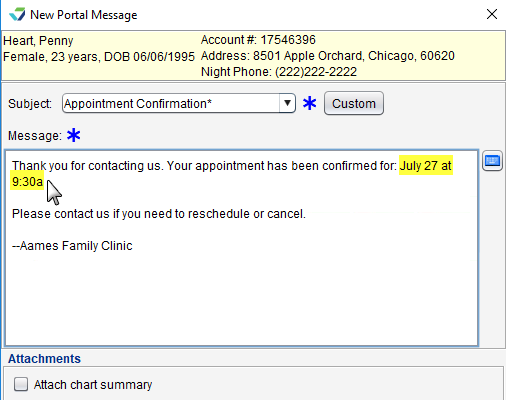
From the message window, select a favorite from the Subject field to populate the message or click Custom to add a free text message. The Message body can be edited or customized with additional text when using a message favorite.
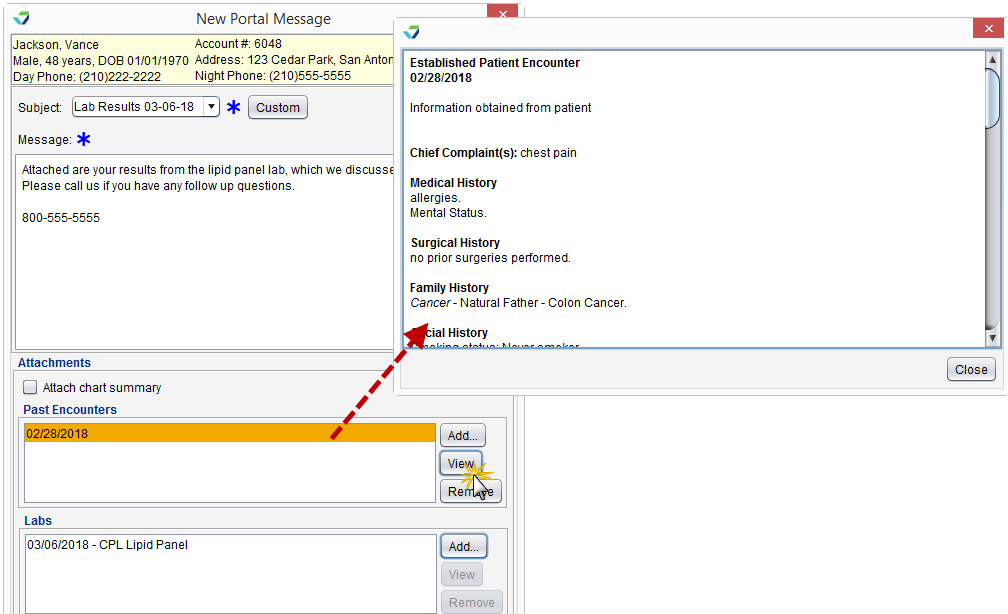
Users sending messages through patient portal and sending referrals and clinical summaries using PPDX are able to view encounter and e-Lab attachments while creating the message.
When an encounter or e-Lab is selected, the user can click View to display the attachment in a window outside the message. Users can manually close the attachment display window(s) before sending the message; however, any open windows will close automatically when the message is sent.
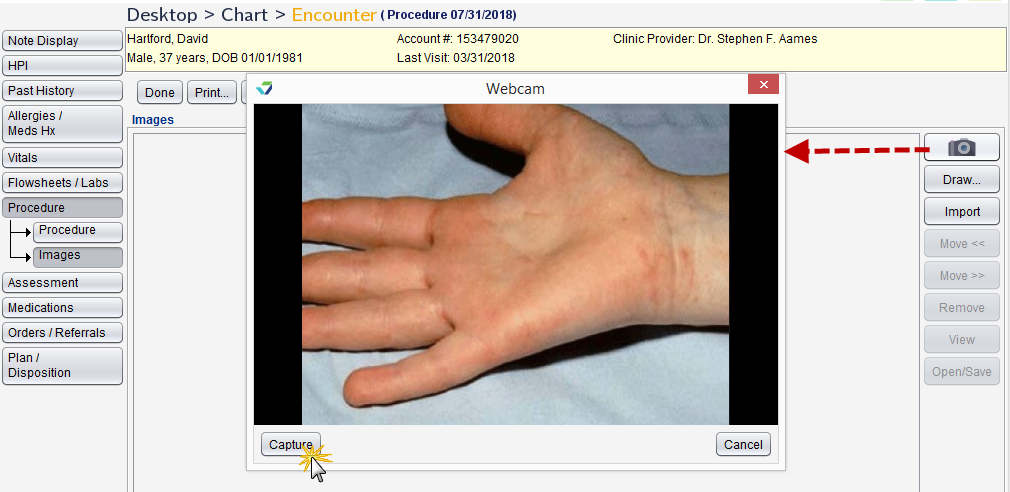
Users can now import images directly from their webcam into Sevocity. Images can be imported into the Patient Photo field in Demographics or into the Images subtab in the Physical Exam and Procedure tabs in an encounter.
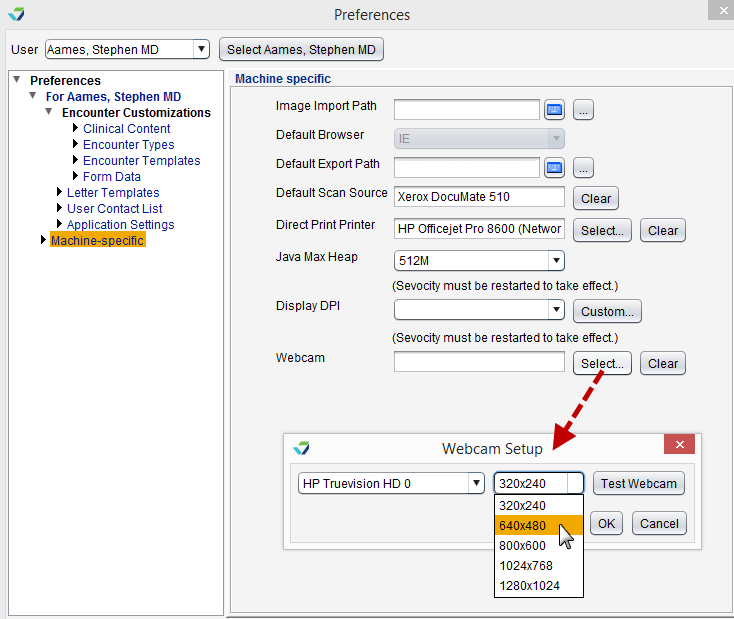
Webcam configuration is computer-specific. To set up a webcam, go to Tools > Preferences > [user] > Machine-specific and click Select in the Webcam section. The webcam installed on the computer is automatically detected. Select a size for the captured images and click OK to save. Sevocity must be restarted for the settings to take effect.
Once enabled, a camera icon![]() will display above the patient photo field in Demographics and in the Images subtab in the Physical Exam and Procedure tabs in an encounter. The webcam is also available from the Draw feature in the Images subtab. To use the integrated webcam, click the camera icon and click Capture to save the photo.
will display above the patient photo field in Demographics and in the Images subtab in the Physical Exam and Procedure tabs in an encounter. The webcam is also available from the Draw feature in the Images subtab. To use the integrated webcam, click the camera icon and click Capture to save the photo.
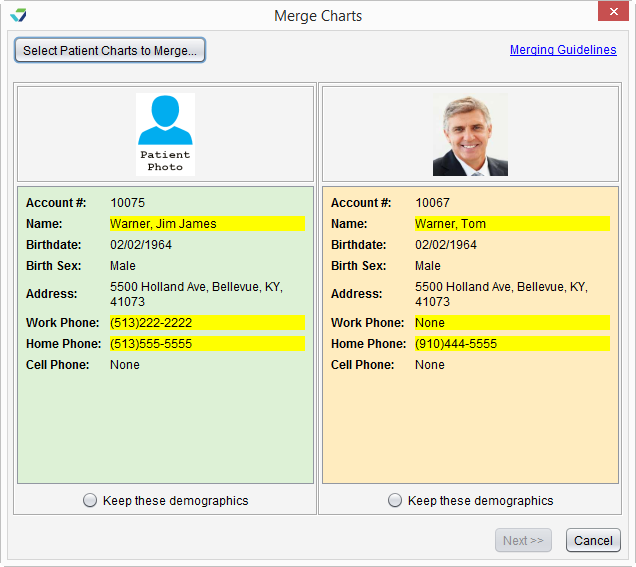
The Clinic Administrator tool for merging charts has been strengthened to prevent unnecessary or accidental merging of patient records. These improvements are designed to increase patient safety and clinical data integrity. New features to the Merge Duplicate Charts tool include:
- Patient photo display
- Highlighted differences between charts selected for merge
- Messages to allow the user to confirm they are merging the correct charts
- Embedded merging guidelines and best practices for reconciling duplicate charts that do not meet the merge requirements
Questions about our new features?
Contact Sevocity Support 24/7 at 877‑777‑2298 or support@sevocity.com
